 Mick's Everyday Camp Oven Cooking E-Book
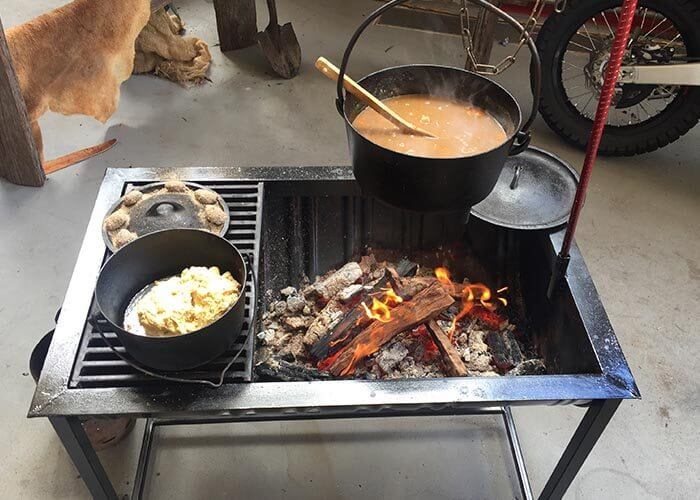
  Mick's Camp Oven Stand
  Camp Oven Cooking Strap
  Camp Oven Cooking Sticker Sheet
  Camp Oven Lid Lifter
  Micks Marshmallow Roasting Sticks
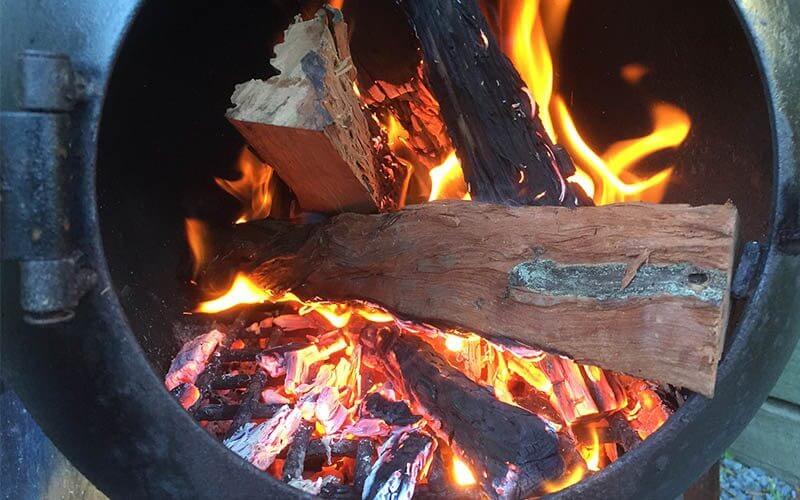
 Have you just bought yourself an Ozpig and find it hard to create a fire in it? Follow my tried and tested method and you will be up and running in no time at all! If you have any questions feel free to leave a comment below and we will get back to you asap. For more information on the Ozpig have a look at their website.
Things you will need!
- Your Ozpig (set up on level ground)
- Dry kindling / firewood
- Fire starters / newspaper
- Matches / lighter
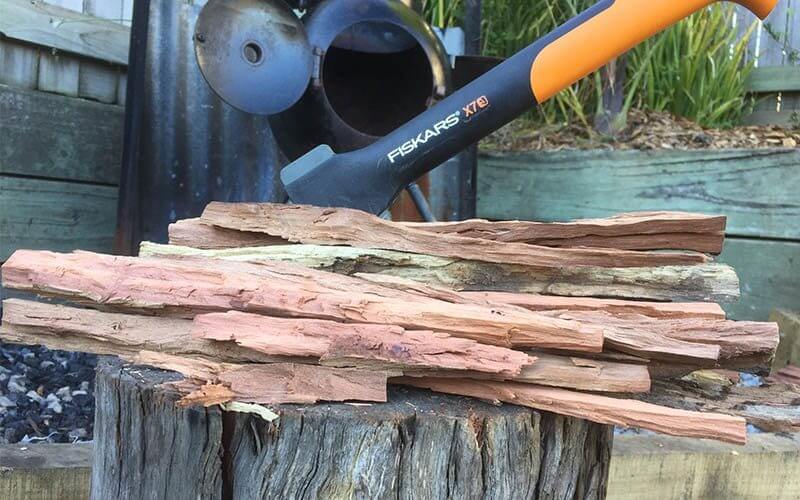
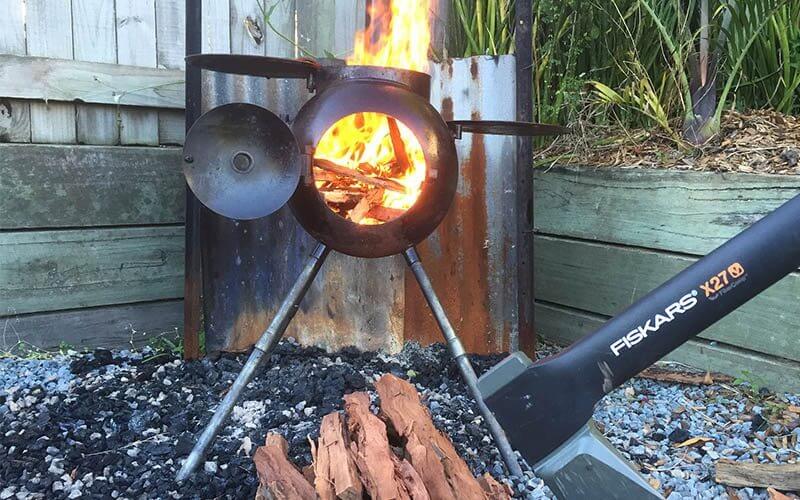
- Axe / splitter – I use and recommend Fiskars combo splitters
Step 1 – Preparing your Ozpig food!
I like using a good quality dry hard wood for my pig food as it produces the best heat for warmth and cooking. Before using your Ozpig always ensure that there is no fire bans and that you can light a fire in the area you are camping.
What size wood do you use?
Kindling – split up some wood in to small slithers for kindling no bigger then 1-2cm
Firewood – split up your wood smallish sizes no bigger then your wrist (50mm diameter)
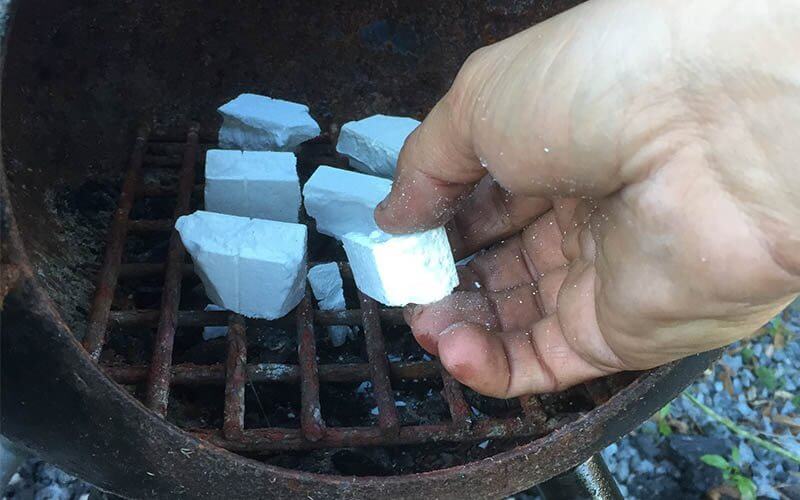
Step 2 – Placing fire lighters in the belly of the Ozpig!
I like to use fire lighters to get my fire started as it creates a lot of heat to start the wood burning and creates far less smoke then using paper. I simply place 4-6 pieces in the bottom of the Ozpig.
What are fire lighters?
Firelighters are small solid fuel tablets that are designed to replace kindling in starting a fire. They are readily available at most supermarkets and hardware stores.
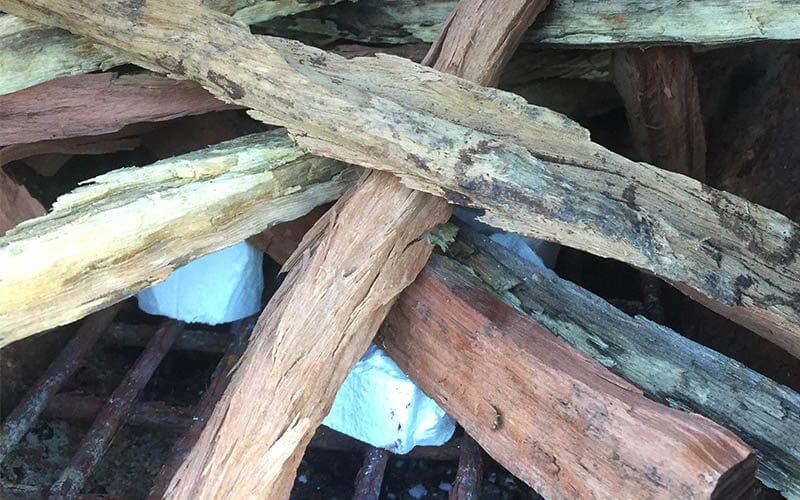
Step 3 – Stacking the kindling!
There is not much to this step, you can either place your firewood in a “tepee” or “crosshatch” stack. Just remember to leave plenty of gaps between the wood for airflow.
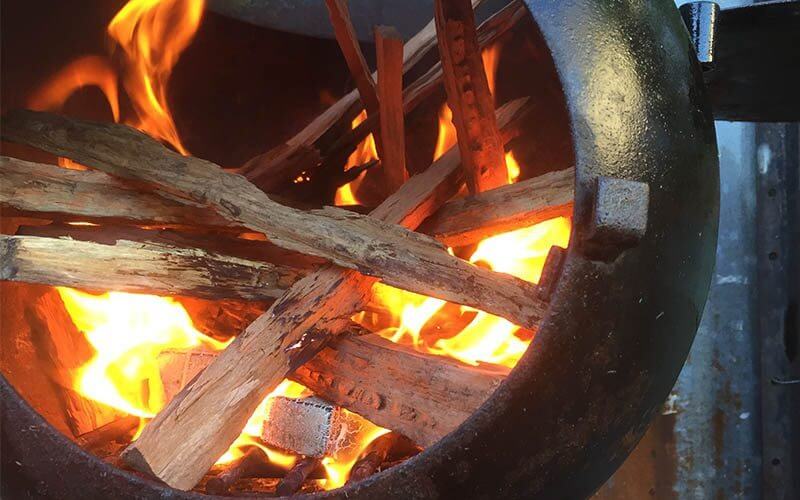
Step 4 – Lighting the fire!
You will need a lighter or matches and and you would light the starters at the front of the Ozpig.
Tips:
- Keep the front door wide open and the top plate swiveled to the side whilst lighting the fire.
- Placing the diffuser over the top opening will prevent any embers escaping.
- Please make sure that everyone in the vicinity is aware that the Ozpig is HOT.
- In case it gets out of hand have a bucket of water, a fire blanket or small fire extingsher on hand.
- Never leave the fire unattended.
Step 5 – Enjoy!
By now your Ozpig should be cranking along nicely so let it go for a bit and enjoy a cold beverage!
Step 6 – Keeping your Ozpig fed!
Now that you have done all the hard work getting your fire cranking you need to keep it running. Gradually begin to feed in your firewood until you have built a good coal base. Only add thicker pieces of timber once you have a good bed of flames.
How do I minimise smoke while using the Ozpig?
There will always be some smoke when first lighting a fire. The Ozpig chamber is designed to be compact, therefore the small inner chamber requires ventilation to keep the fire burning. Keep the door open to varying degrees to prevent the fire from smoking and going out due to lack of oxygen. Alternatively, the OzPig vented door can be purchased from the accessories range to maintain the perfect balance of airflow and heat.

Good description of getting fire going.
I did something silly the other day…was cooking a chook on spit using heat beads in the heat bead basket for a friend and we decided we would start up the wood fire underneath also but used fire starters and newspaper. Put black kero soot all over the chook. Lesson learnt. Either use wood or beads but not both or if want both then start at the same time and don’t put food above kero starters.
Had to laugh the other day another friend was going on and on about how to make a pizza base and was quoting the identical recipe in your book which I have , claiming it as their own brainstorm. Anyway I handed her the book saying nothing but encouragement to look through it and while looking through it she was quite put back to find it there lol.
Hi Maurie, that pizza dough recipe is not original to us and also all over the Internet, not sure who actually invented it
I make pizza dough with 1 and a 1/2 cups of plain flour 1 and a 1/2 cups greek youghurt and pinch of salt and mix to a pliable dough its great and can also use that recipe for foccocia bread.