There are lots of methods to remove rust from rusty camp ovens like detergent and steel wool combined with some elbow grease, soaked in a solution of vinegar and bicarb soda, placed in a container with a mixture of water and Molasses, and much more.
Today we look at cleaning rusty camp ovens with electrolysis. It’s an easy method as it uses an electric current to remove the rust within hours of placing the camp oven into the bath.
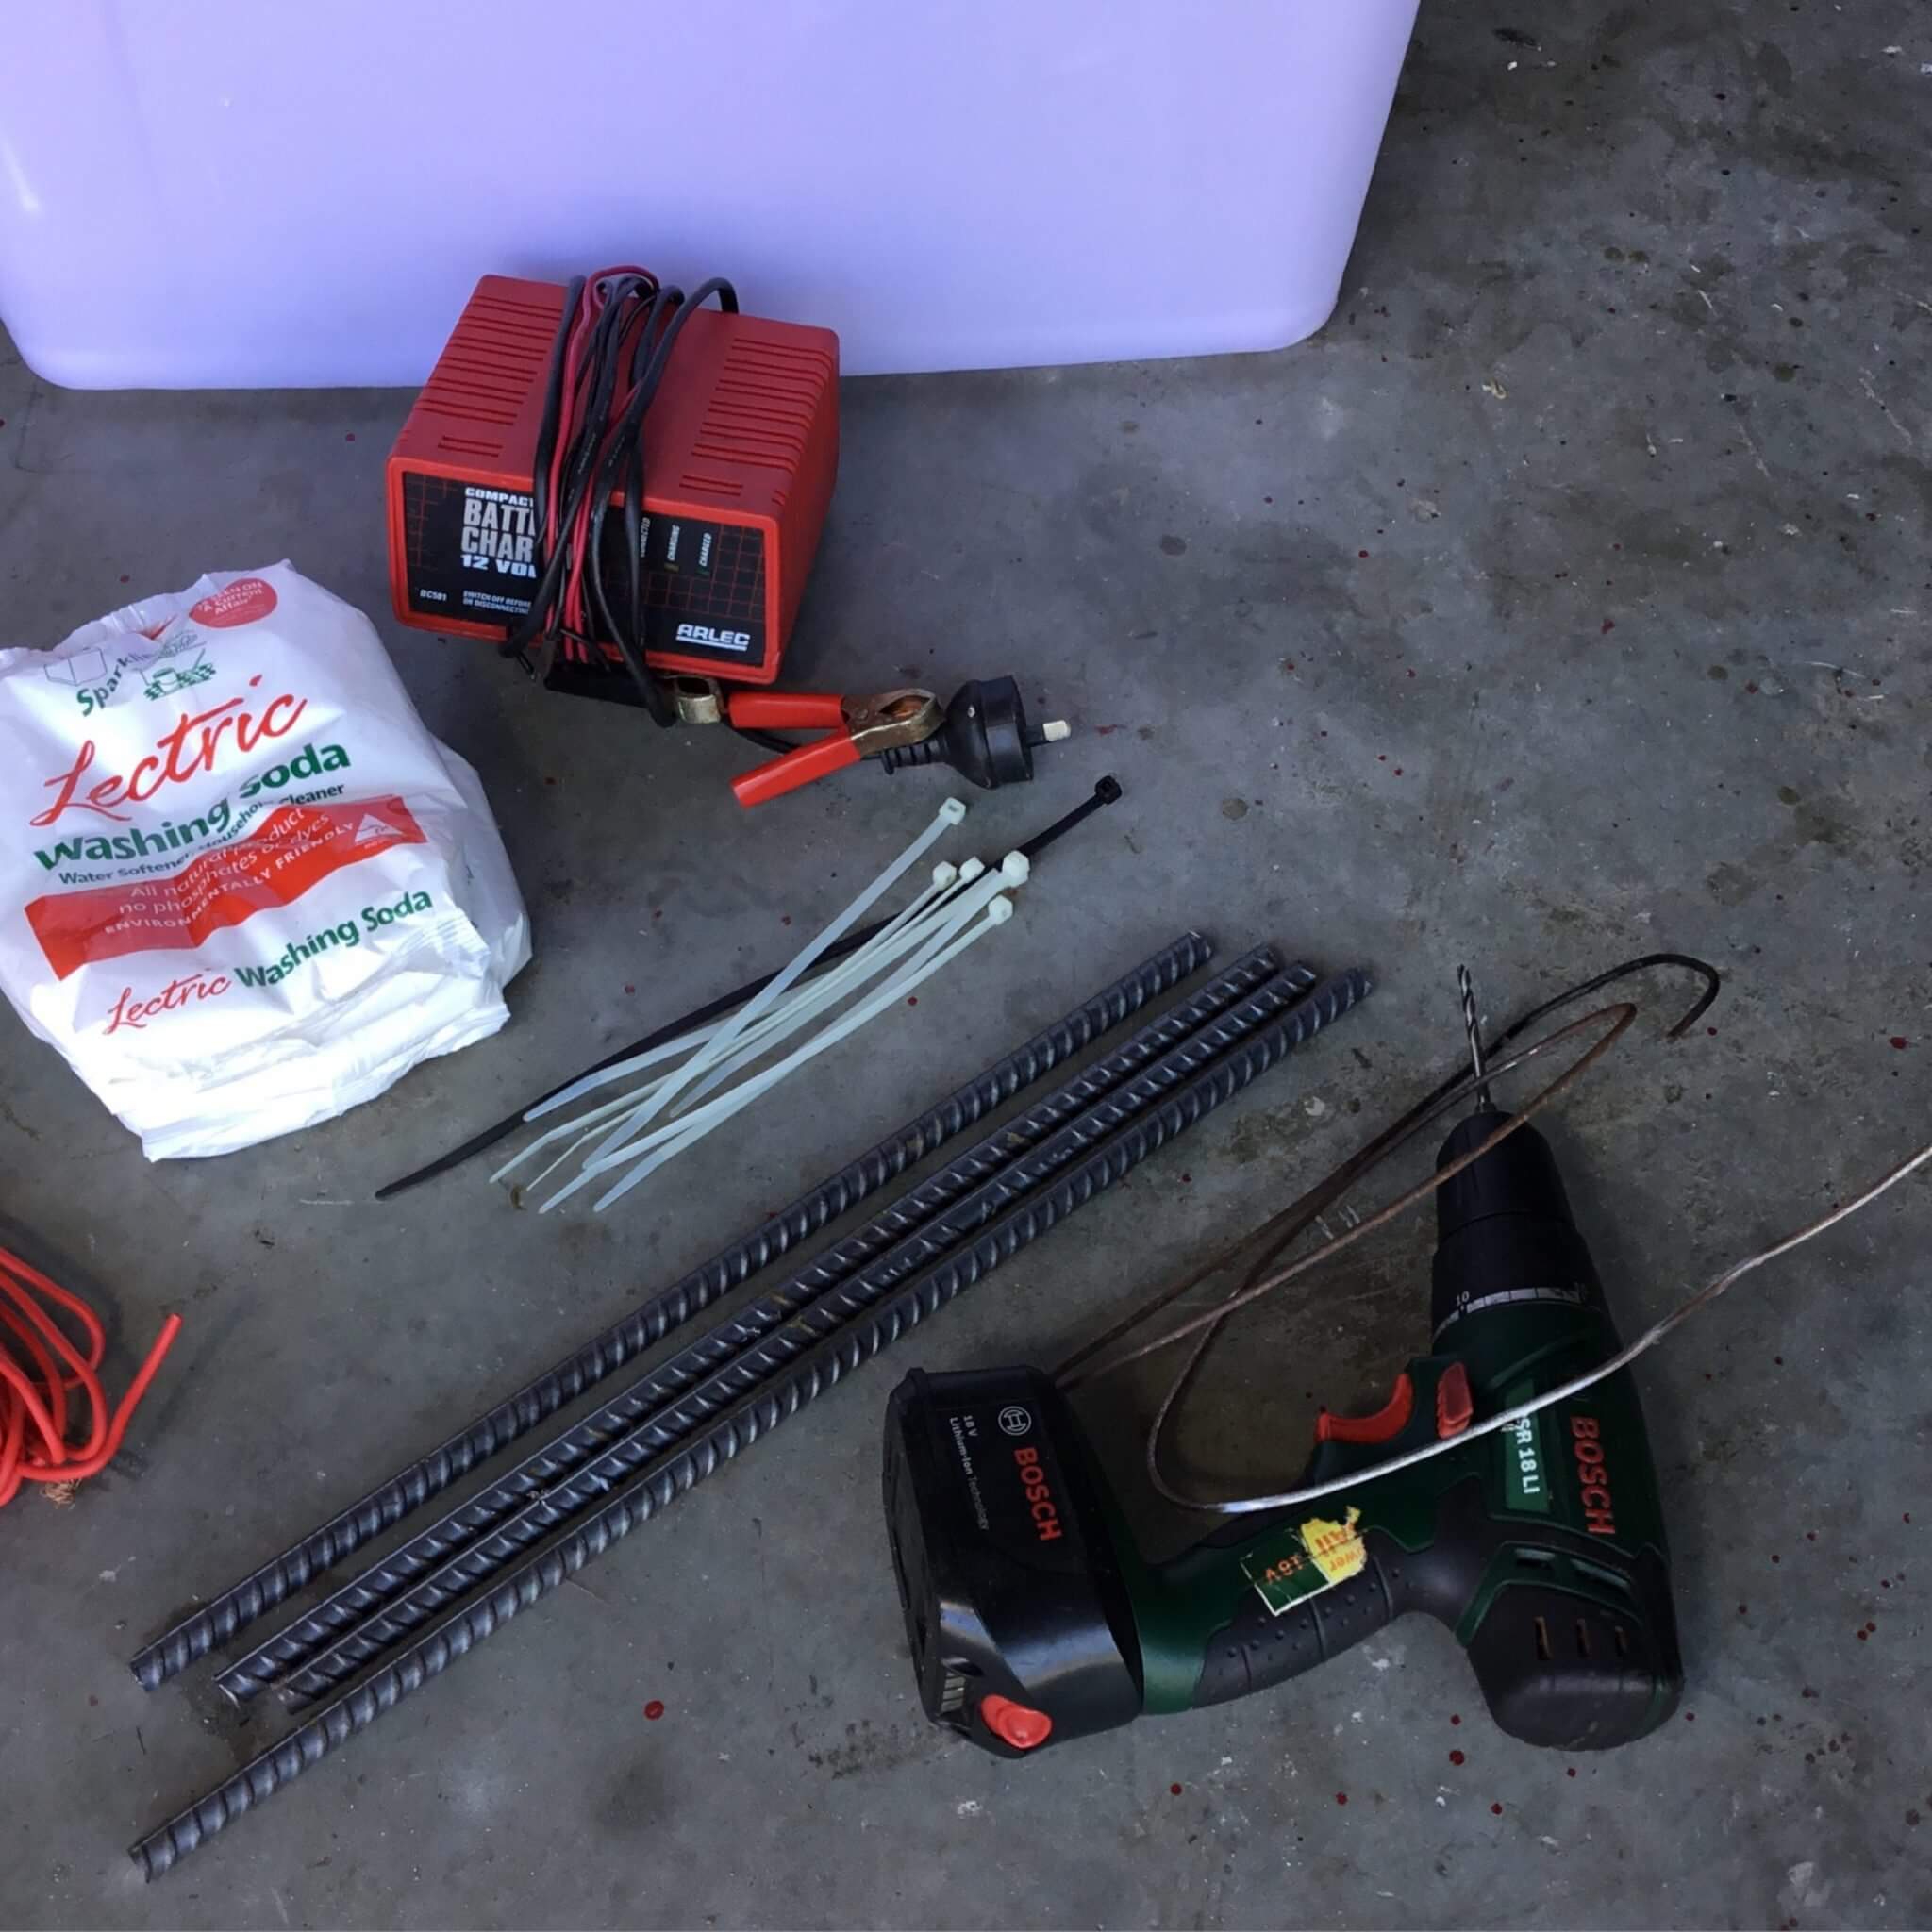
Things you need:
- Manual battery charger (not the new automatic type as they will come up with an error)
- Sacrificial steel for the anodes, I’m using Rio bar
- Lectric Washing soda ( 1\2 cup pre 20 litres)
- Cable ties or wire to attach the anodes
- Wire to hang the camp oven on to the wood
- Electrical wire to join the anodes together
- Plastic bucket or container big enough to fit your oven
- Wood to hang the camp oven off
- Drill and Grinder
Cleaning Rusty Camp Ovens with Electrolysis
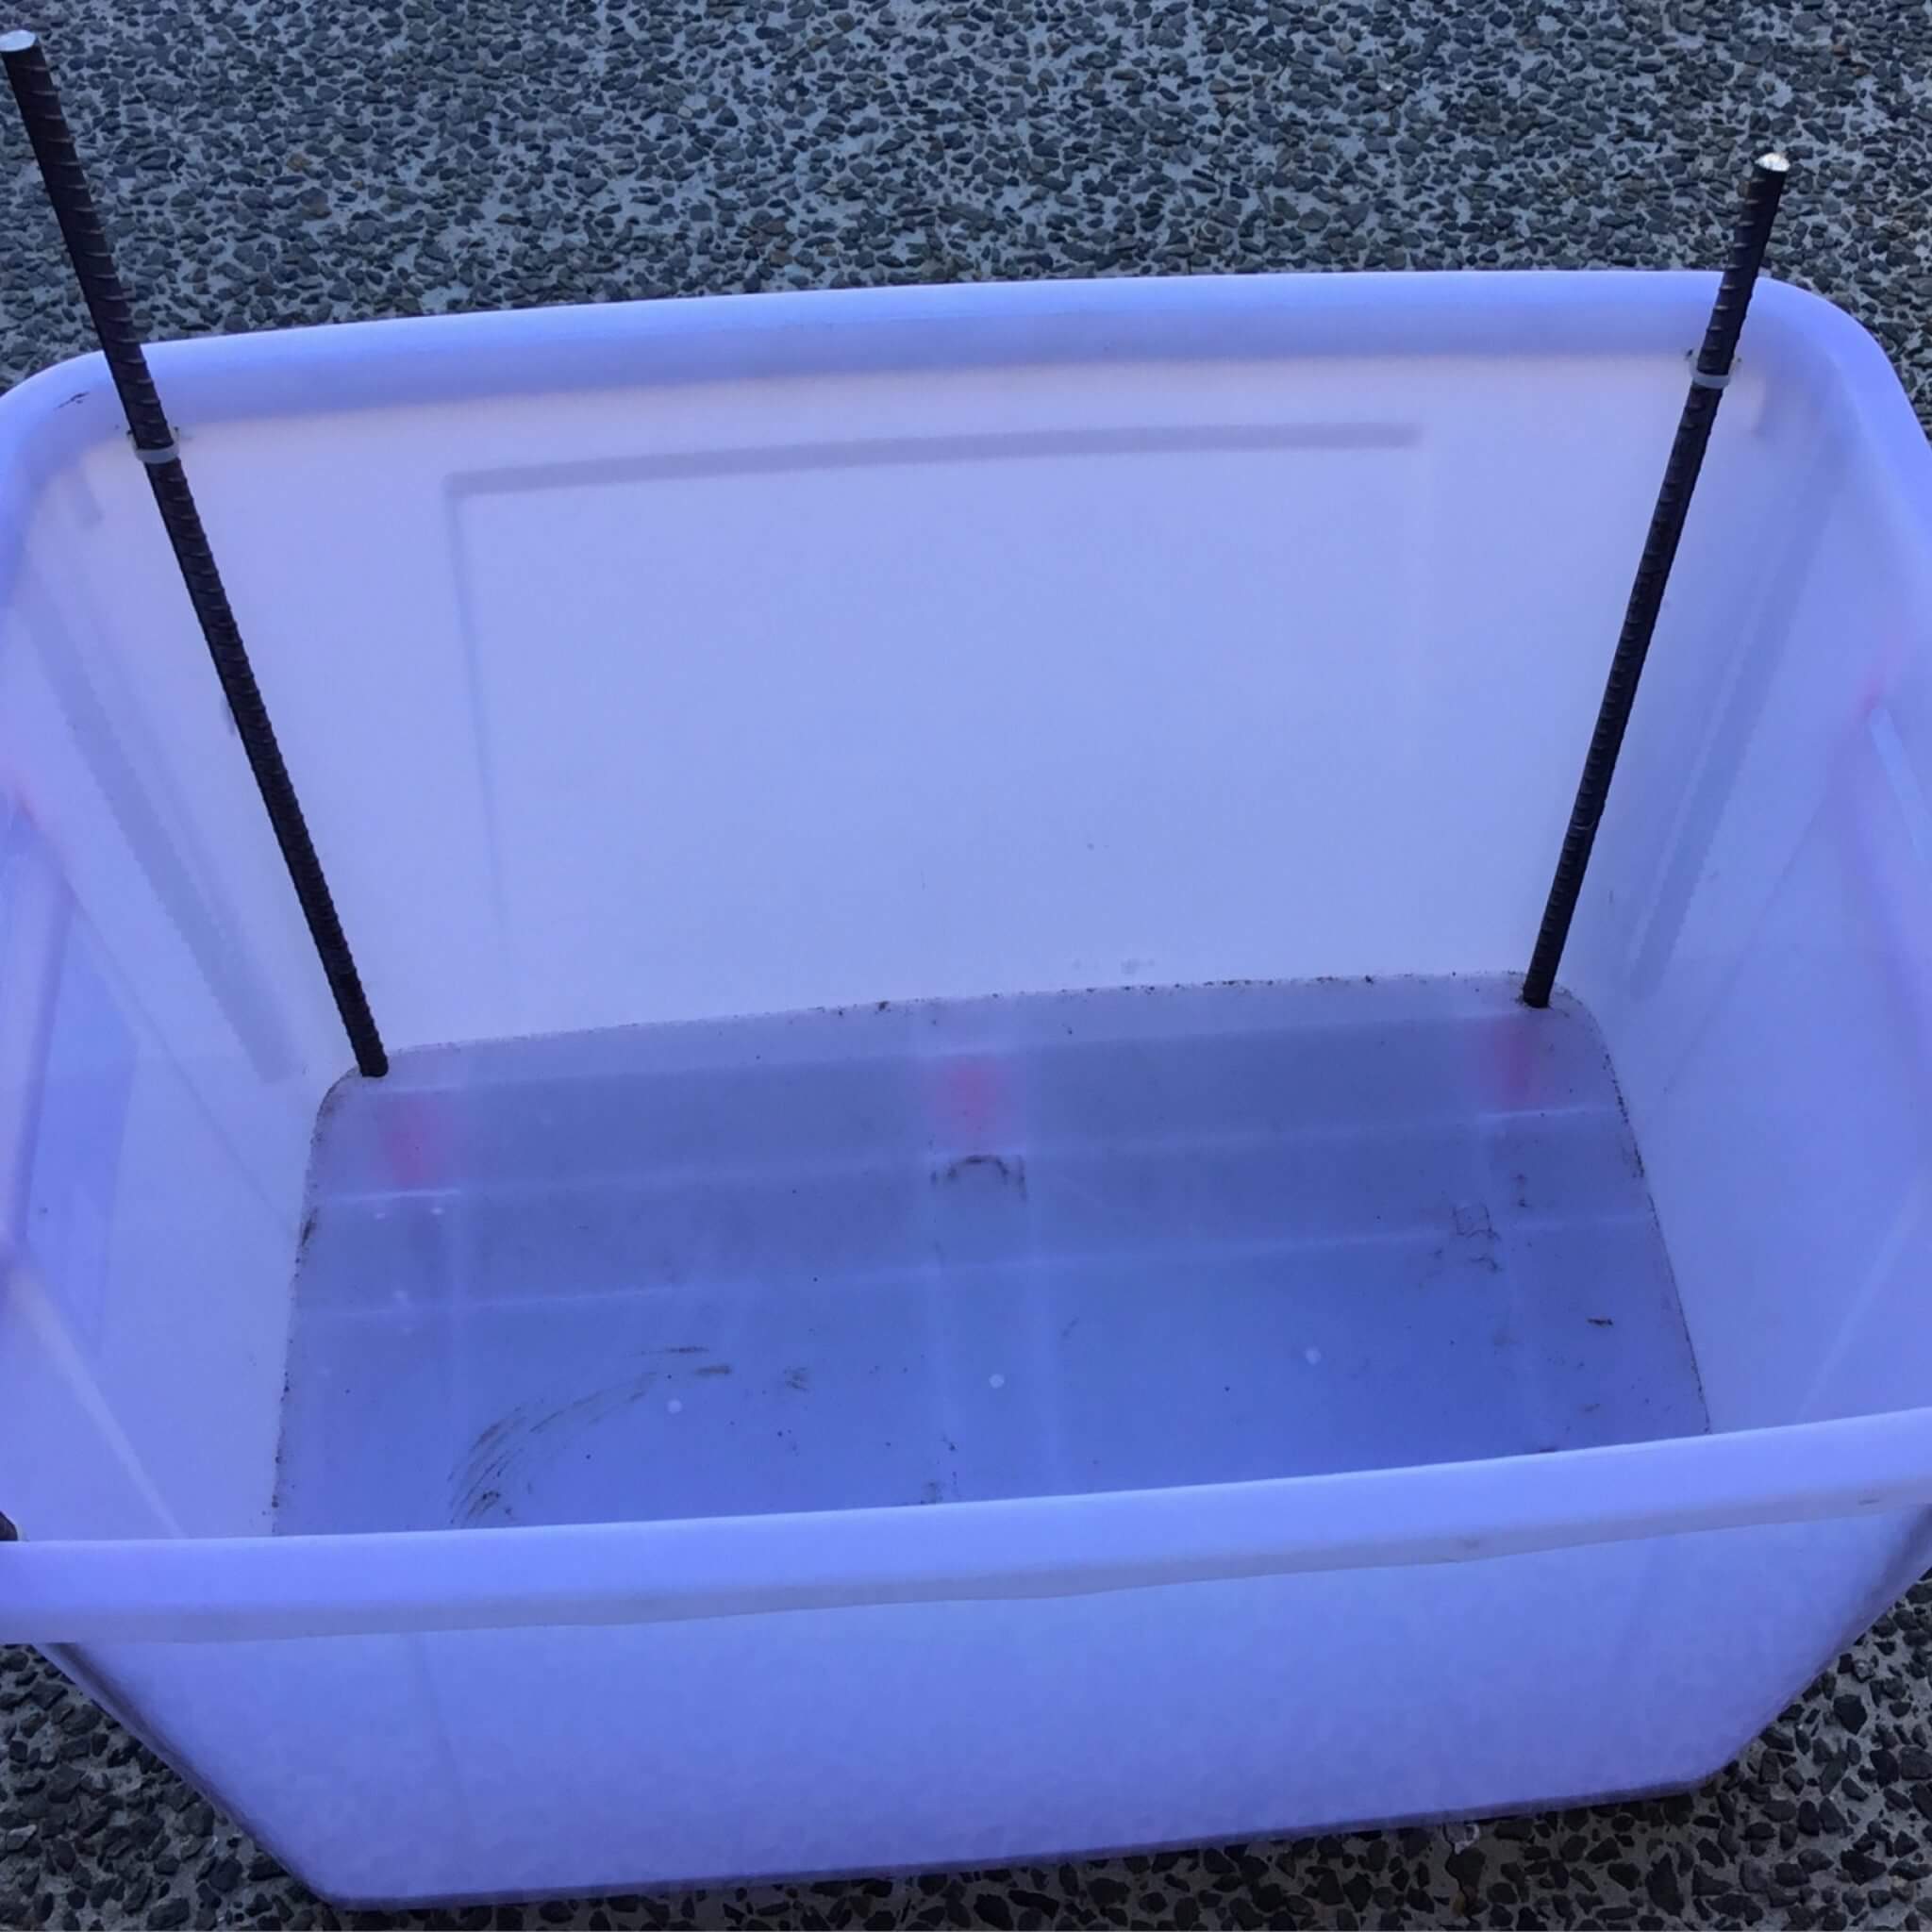
Step One.
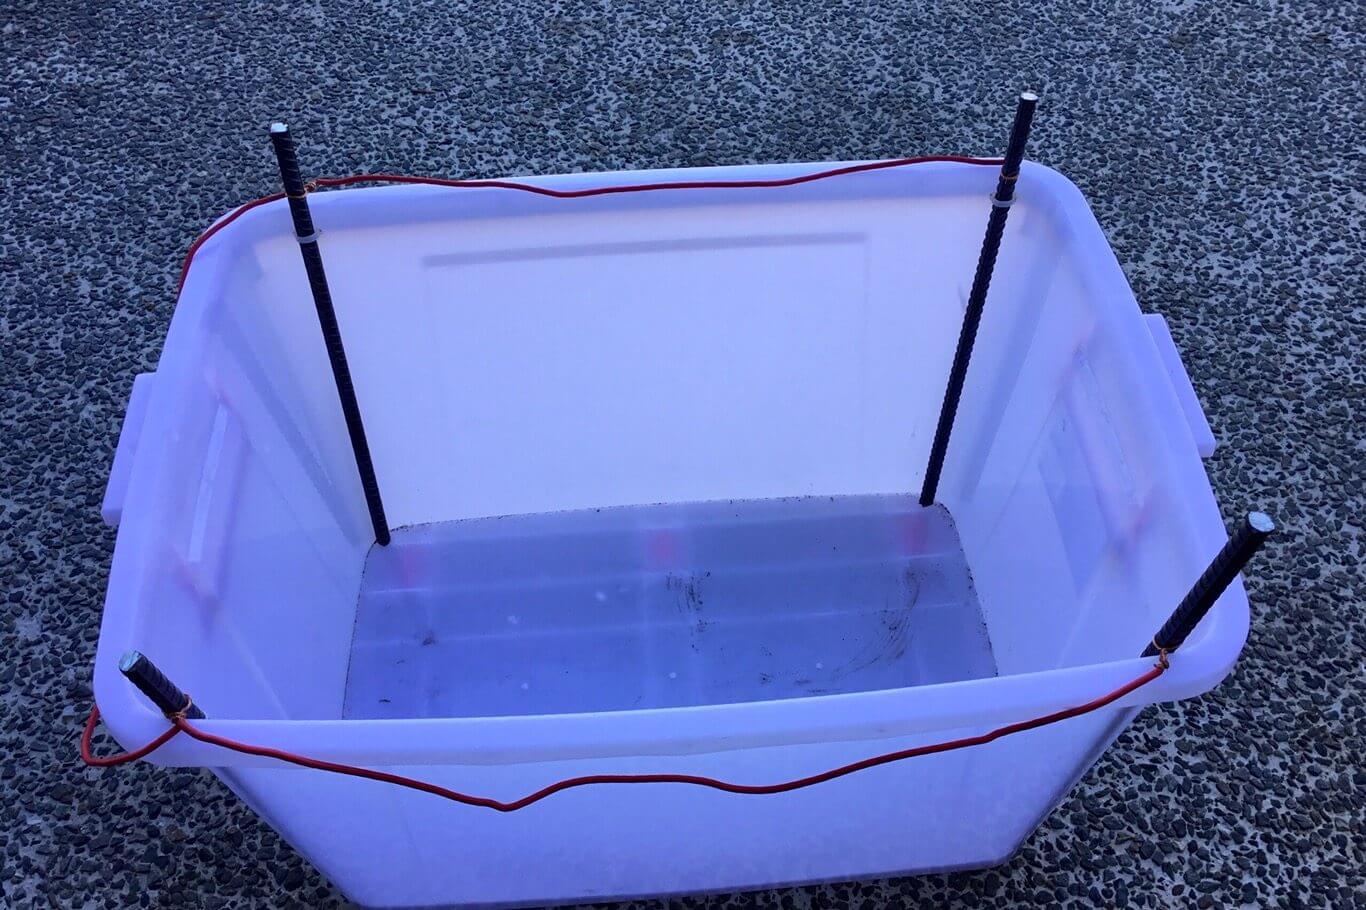
Place an anode in each corner of the bucket, and drill two holes for each anode and fix in place with wire or cable ties.
Things to remember.
- I’m using an anode in each corner because the reaction works on line of sight, so basically when the camp oven is in the middle of the bucket it makes sure it gets the best coverage.
- I have cut three anodes just above the tank, allowing just enough space to attach the electrical cable to join them. I have cut one anode a bit longer to attach the clamp from the battery charger.
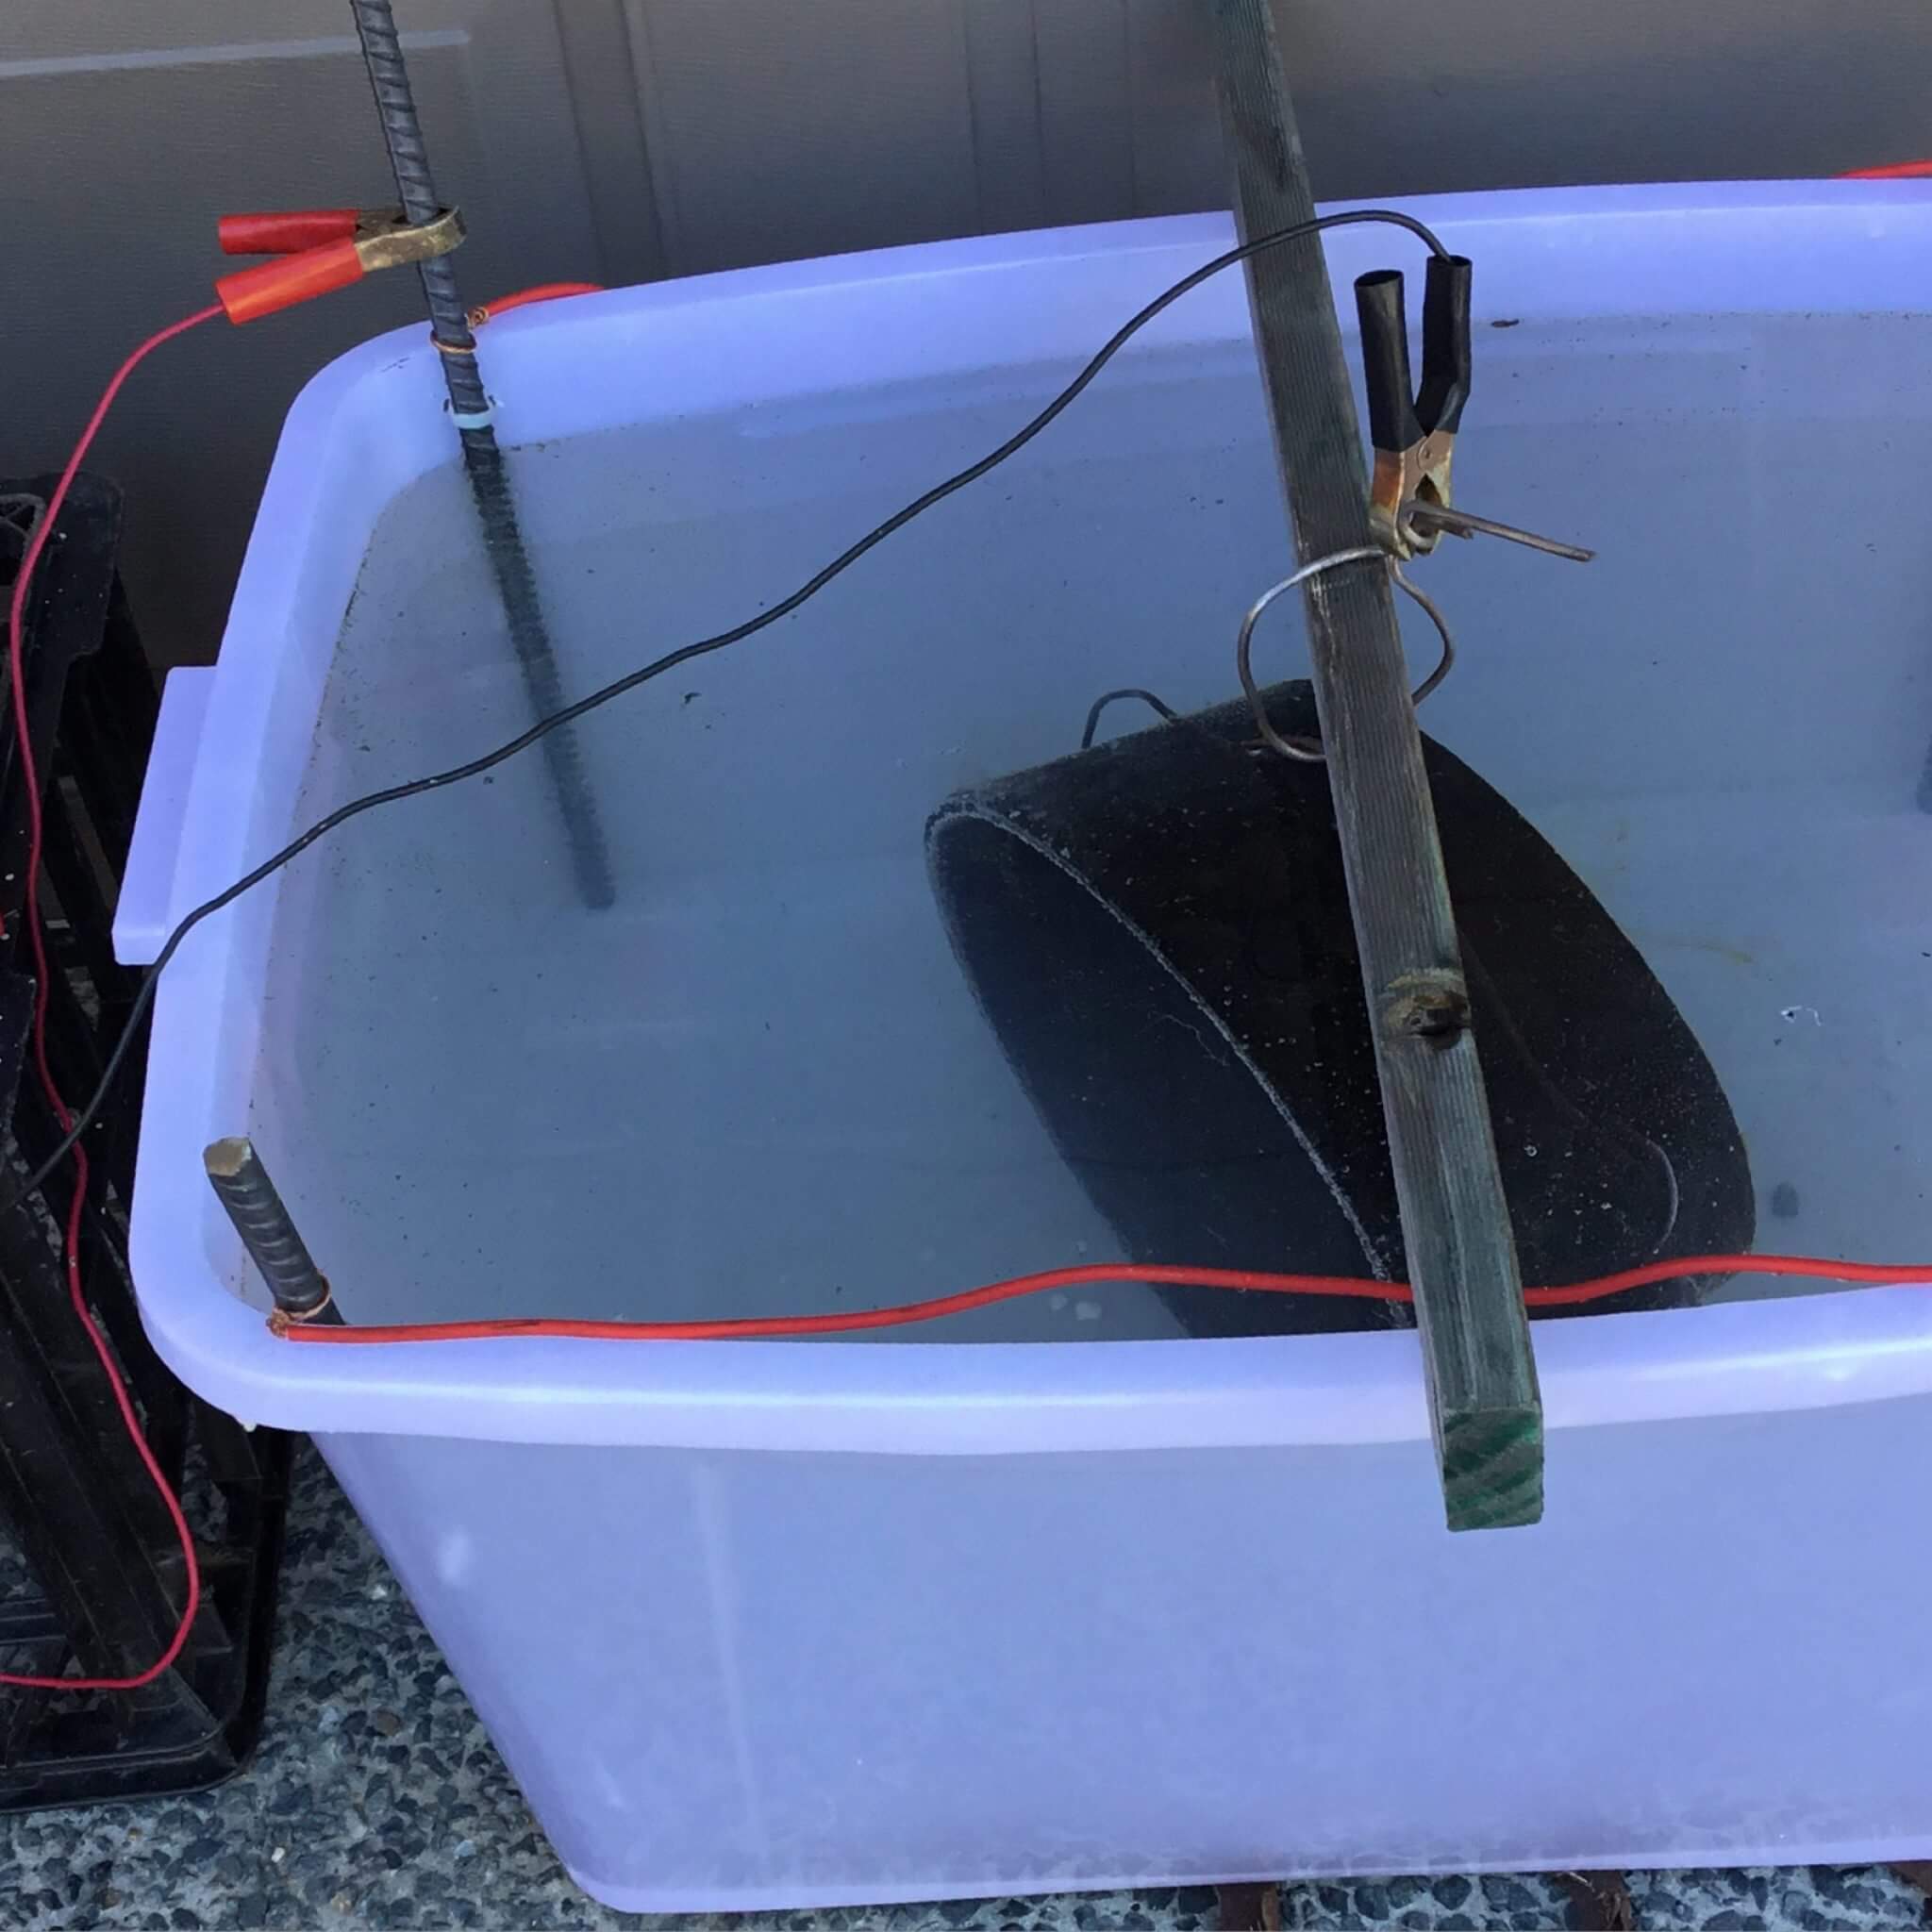
Step Two.
Using the electrical wire, connect each anode together, I stripped each end long enough so that I could wrap the ends around the anodes. Remember it does not matter how you do this step just don’t forget to make sure you keep the wire out of the water.
Step Three.
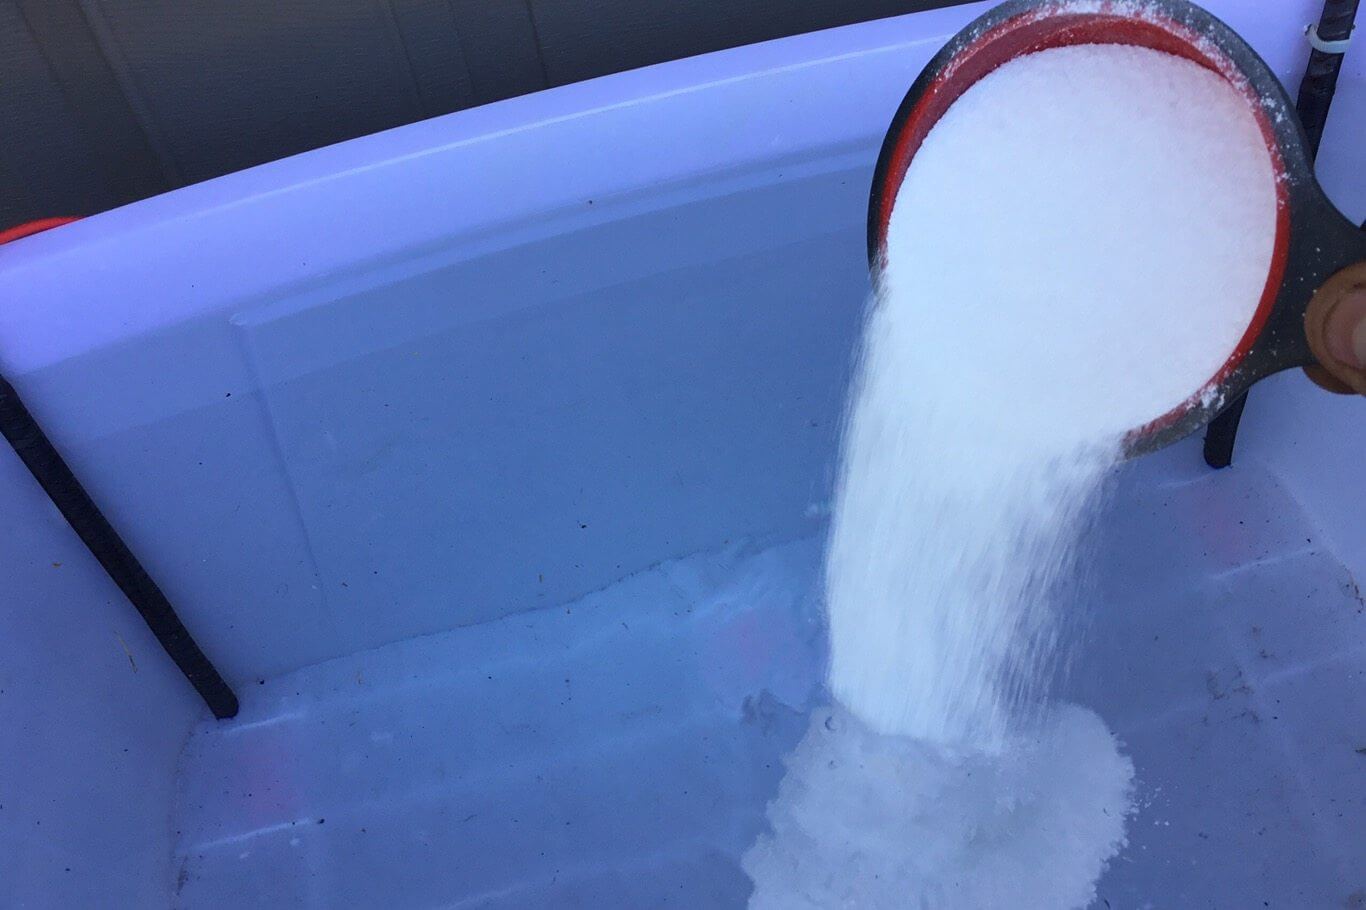
It’s time to fill your tub with water and add the Lectric Washing soda; this can be purchased at your local supermarket from the laundry section, add 1\2 cup per 20 litres of water and give it a good stir until all of the washing soda is dissolved.
Step Four.
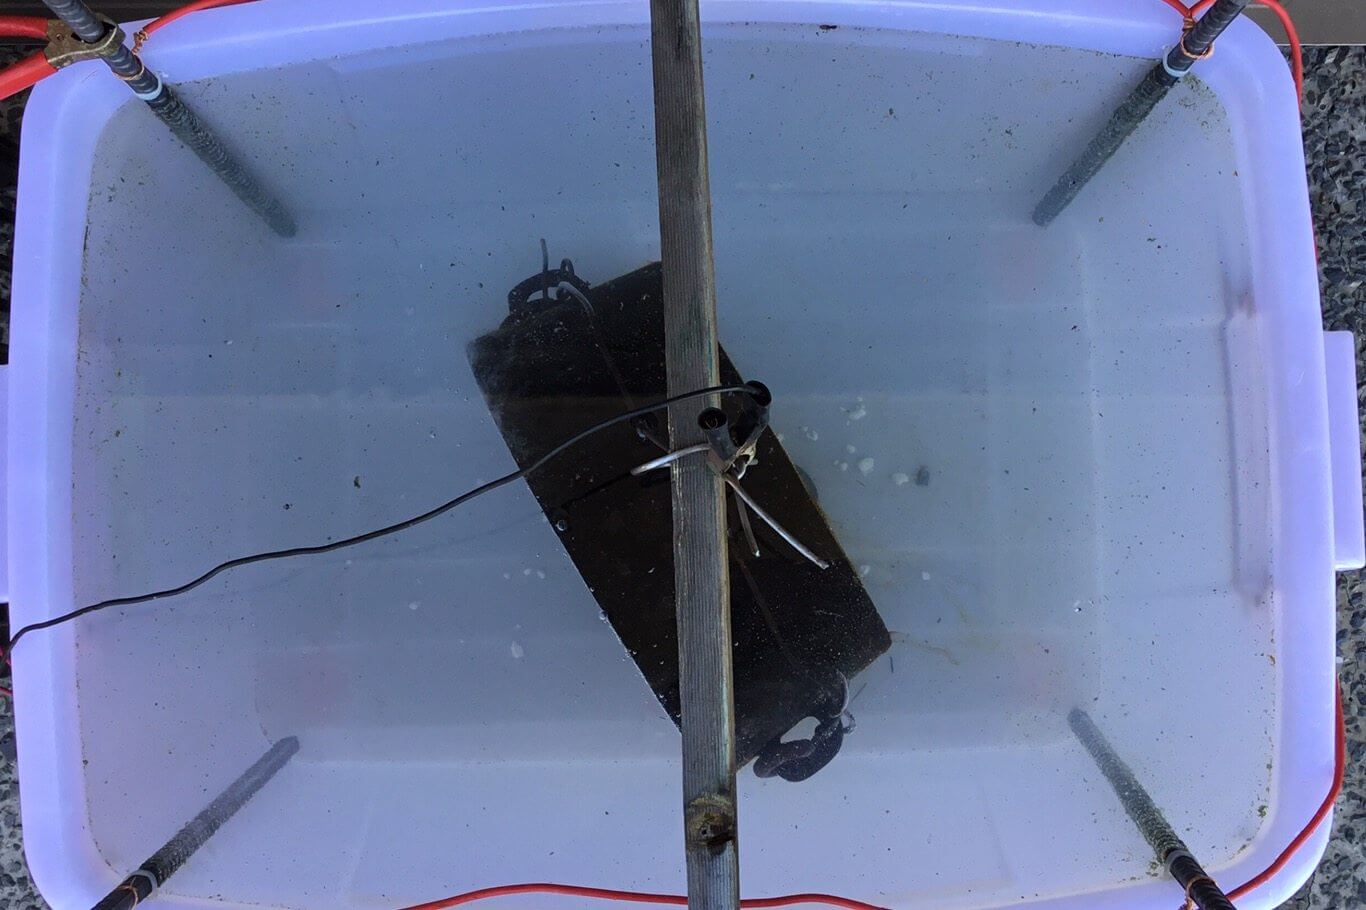
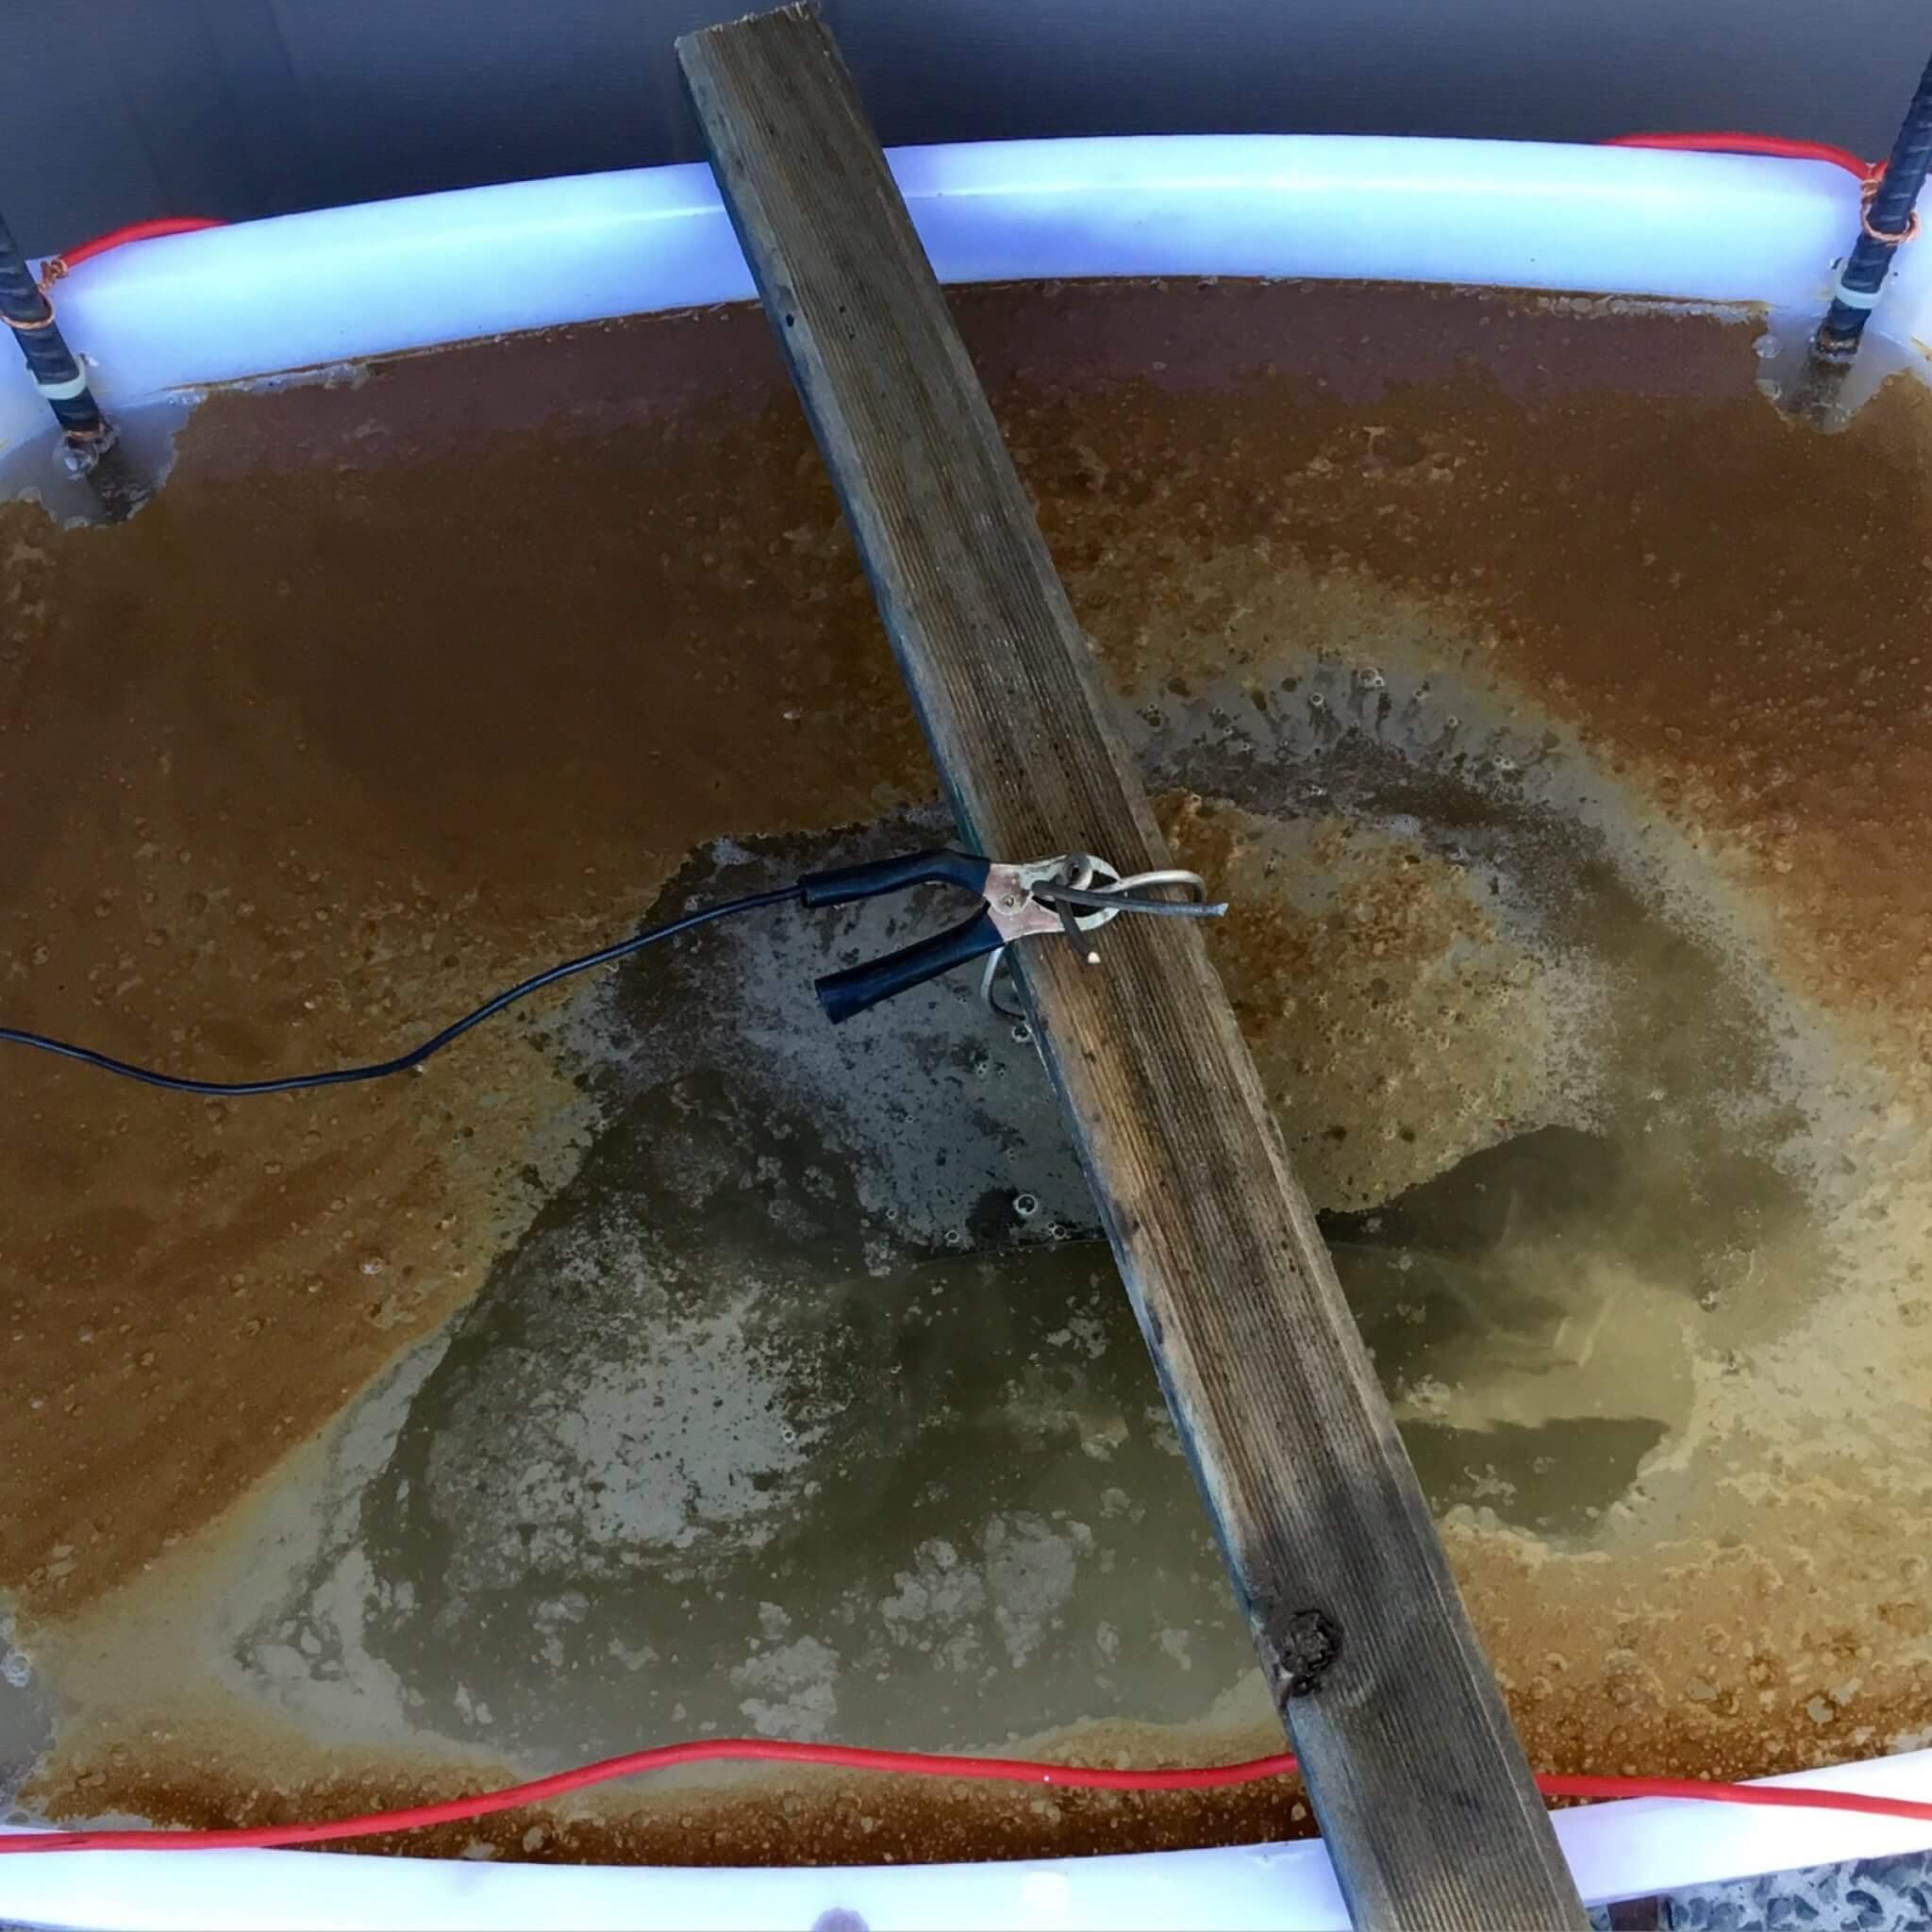
Once you have filled your container, it’s time to tie your camp oven using some wire onto something that is non-conductive and places into the tank and connects up to the battery charger and turns it on. You will notice it start to work pretty much straight away.
Connections:
- positive – connect to the anodes.
- Negative – connect to the wire that you have suspended the camp oven with.
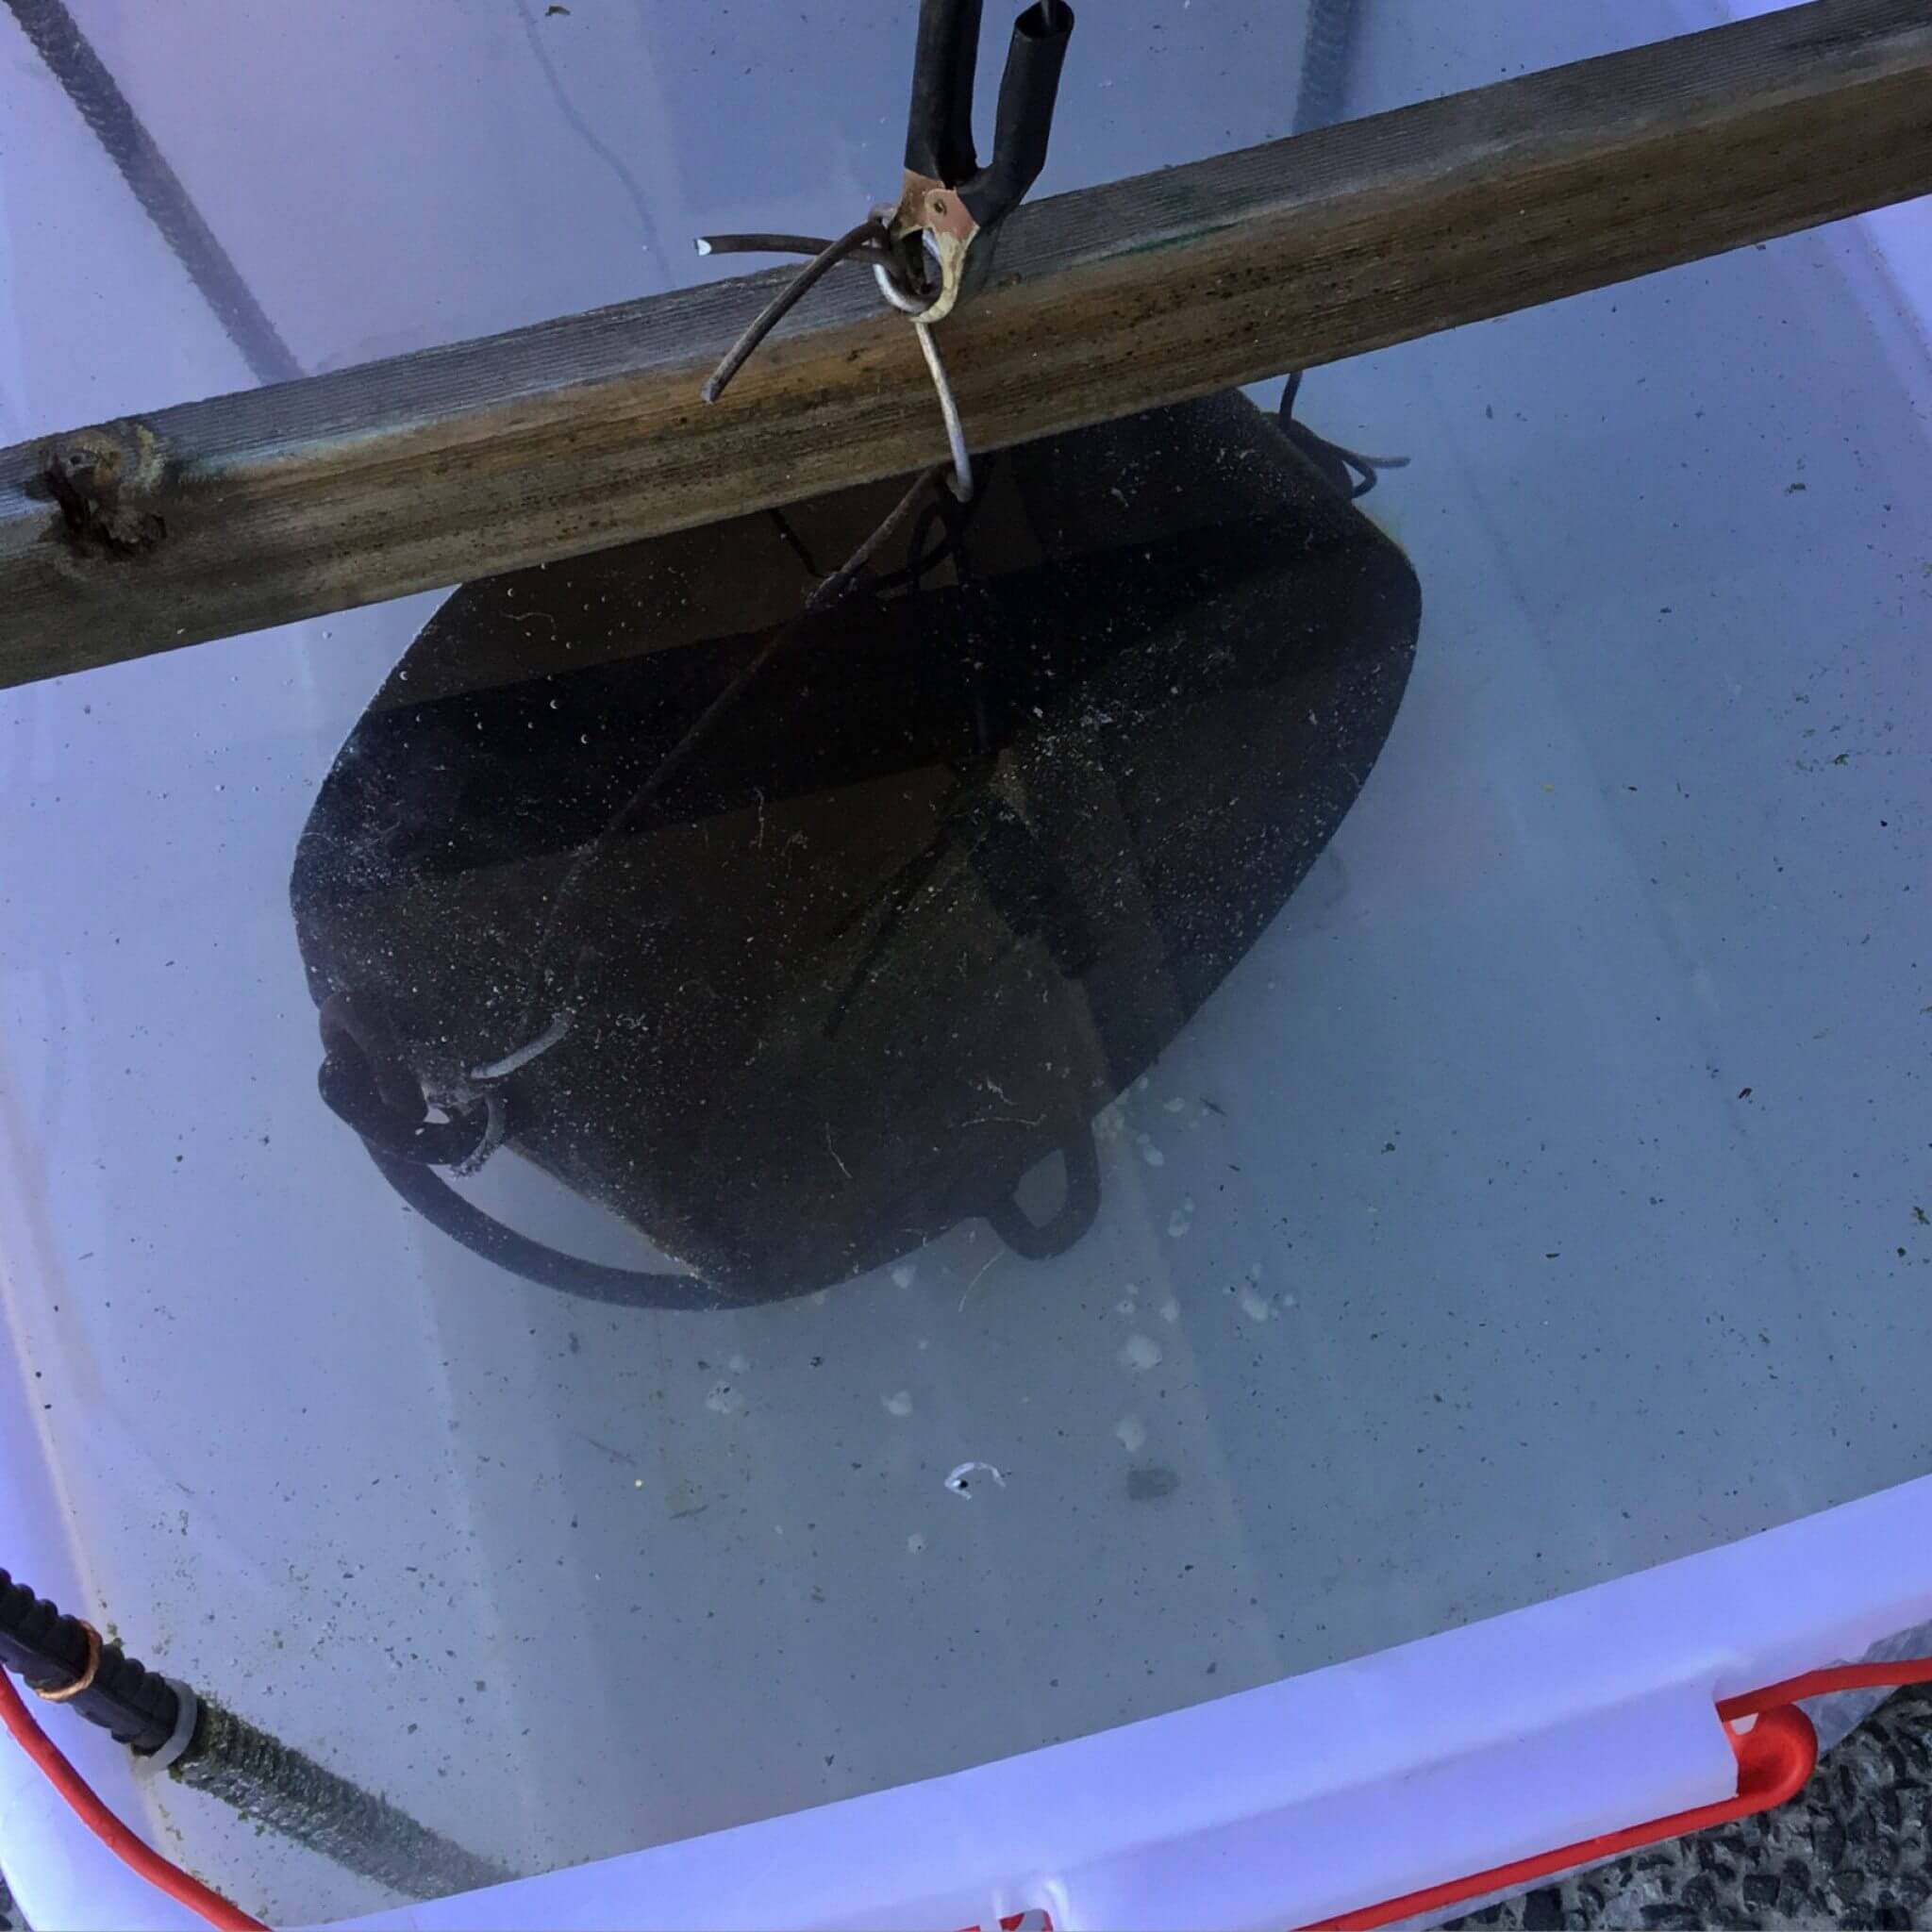
Step Five.
I left the camp oven in the solution for four hours. Before removing the camp oven from the bath make sure you unplug the charger and remove the connections, on inspection, I found 4 hours was sufficient for this camp oven.
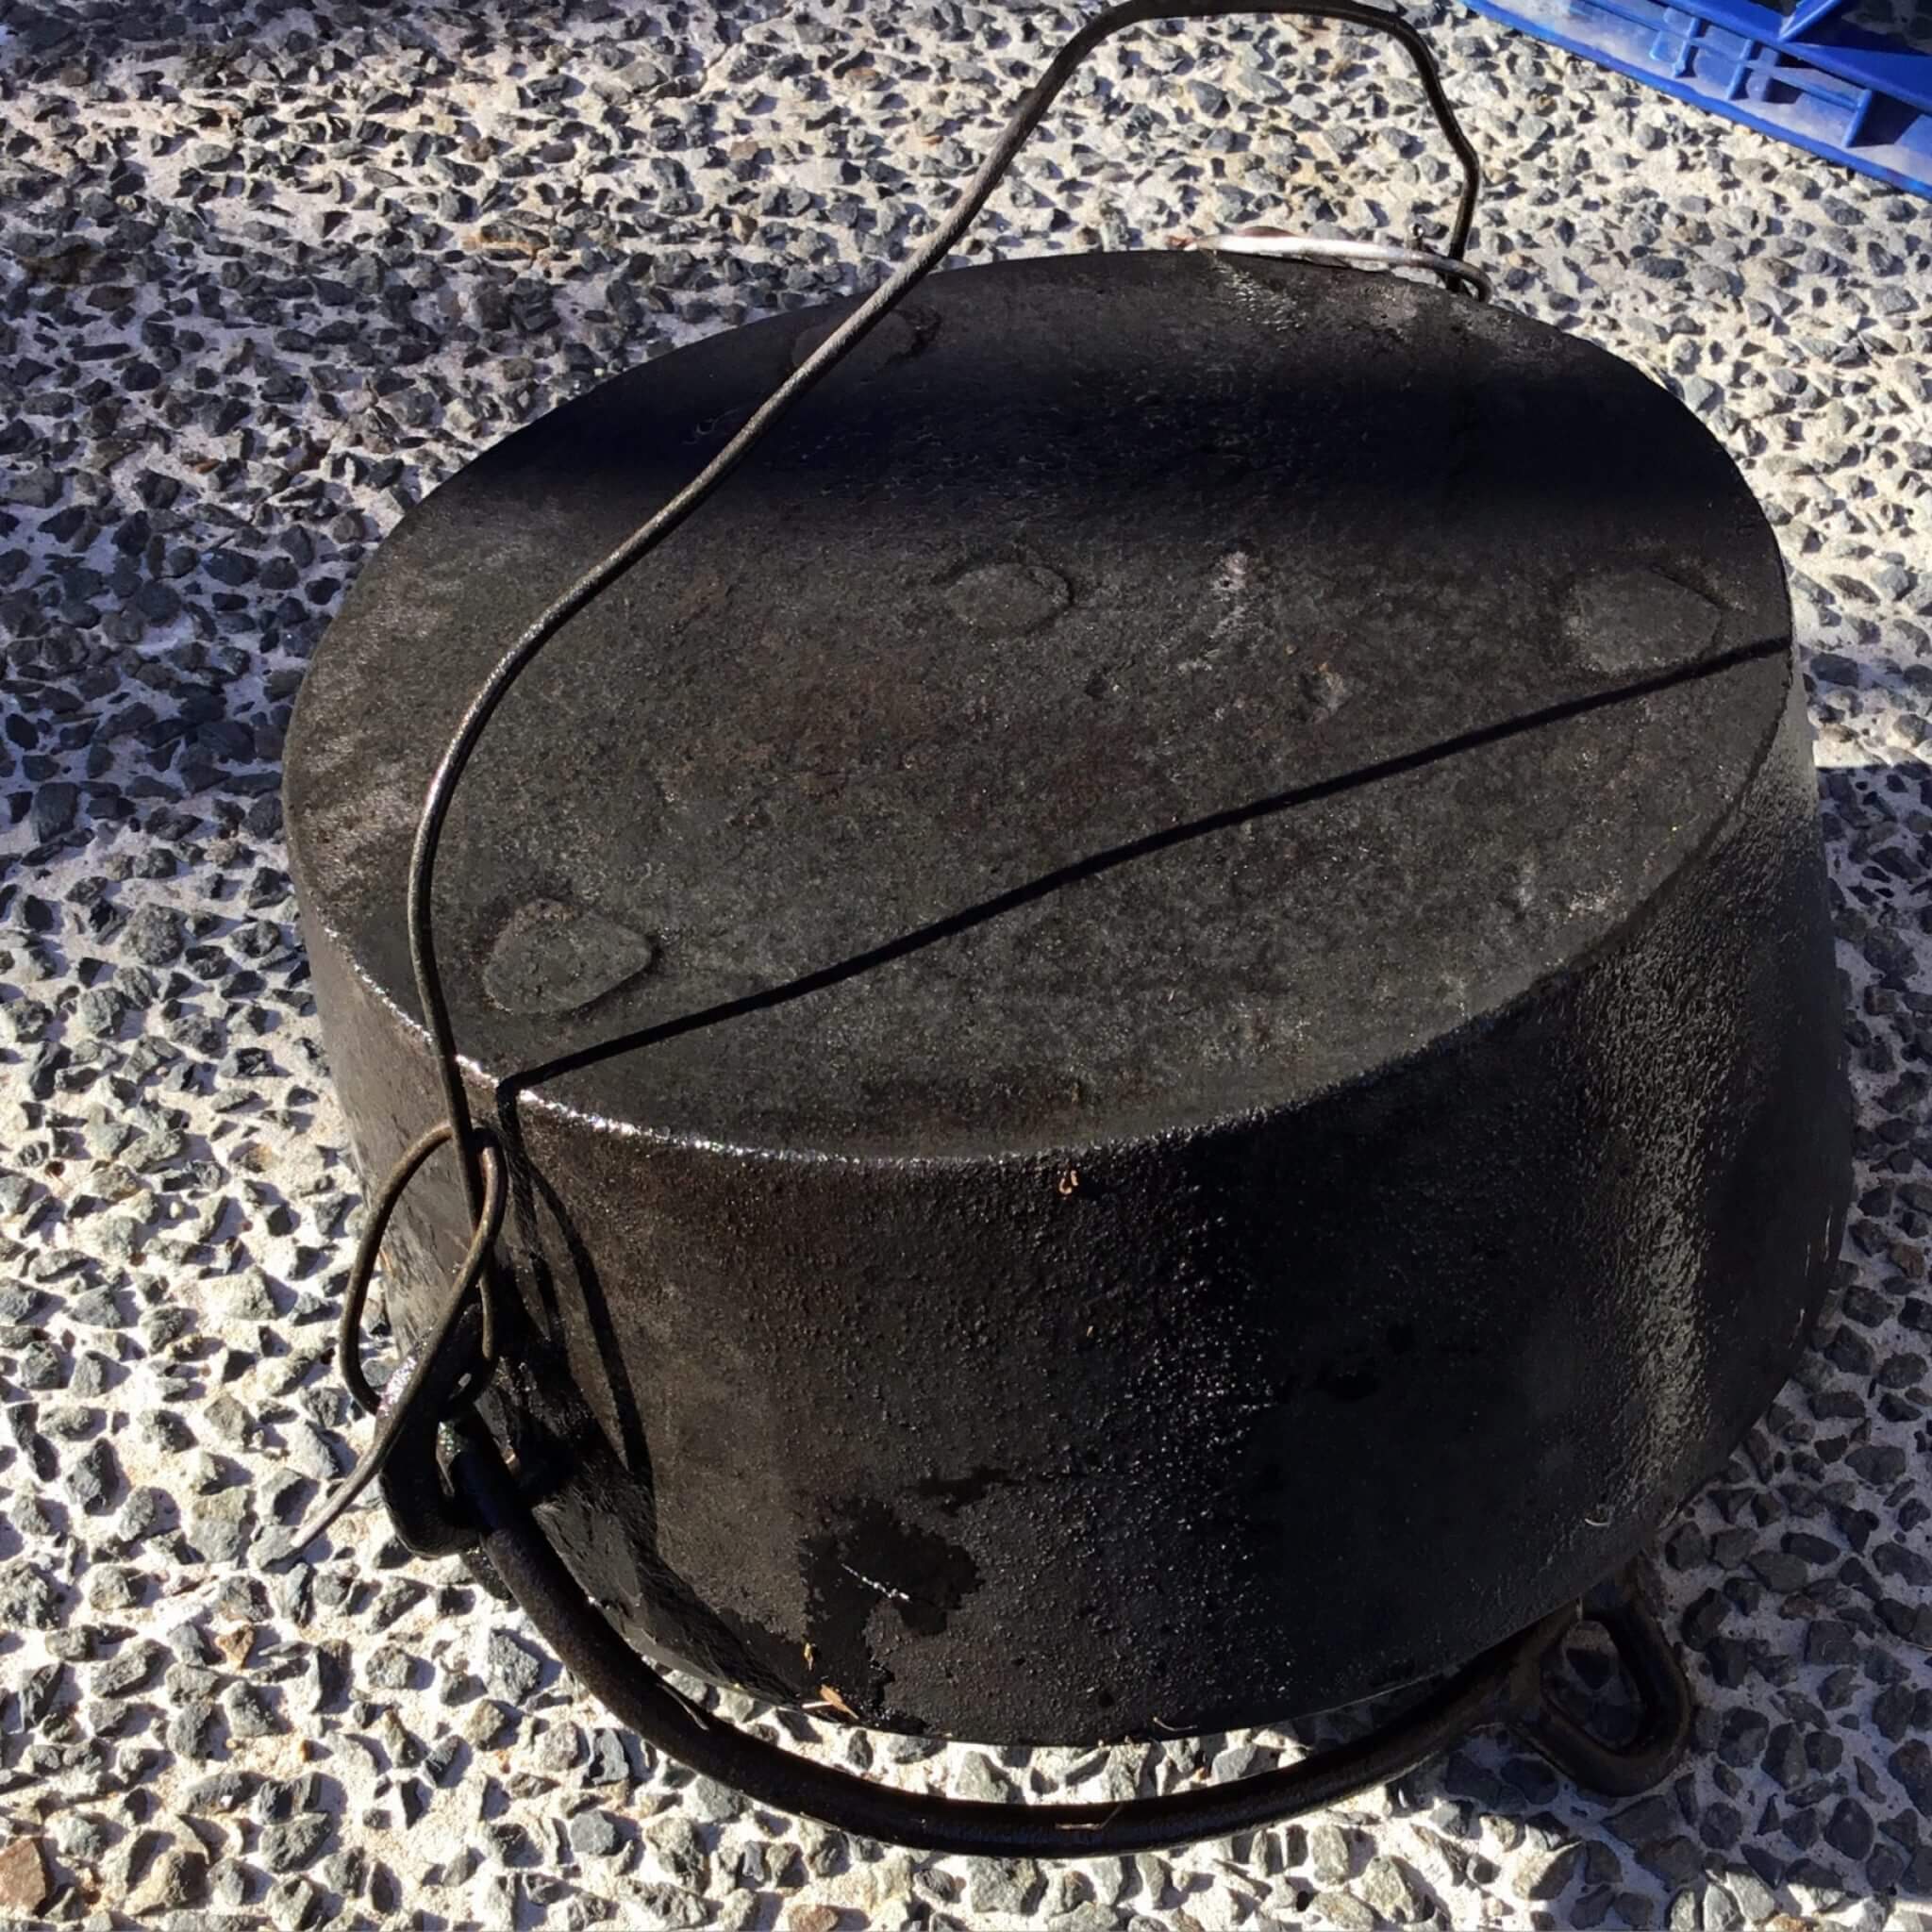
Step Six.
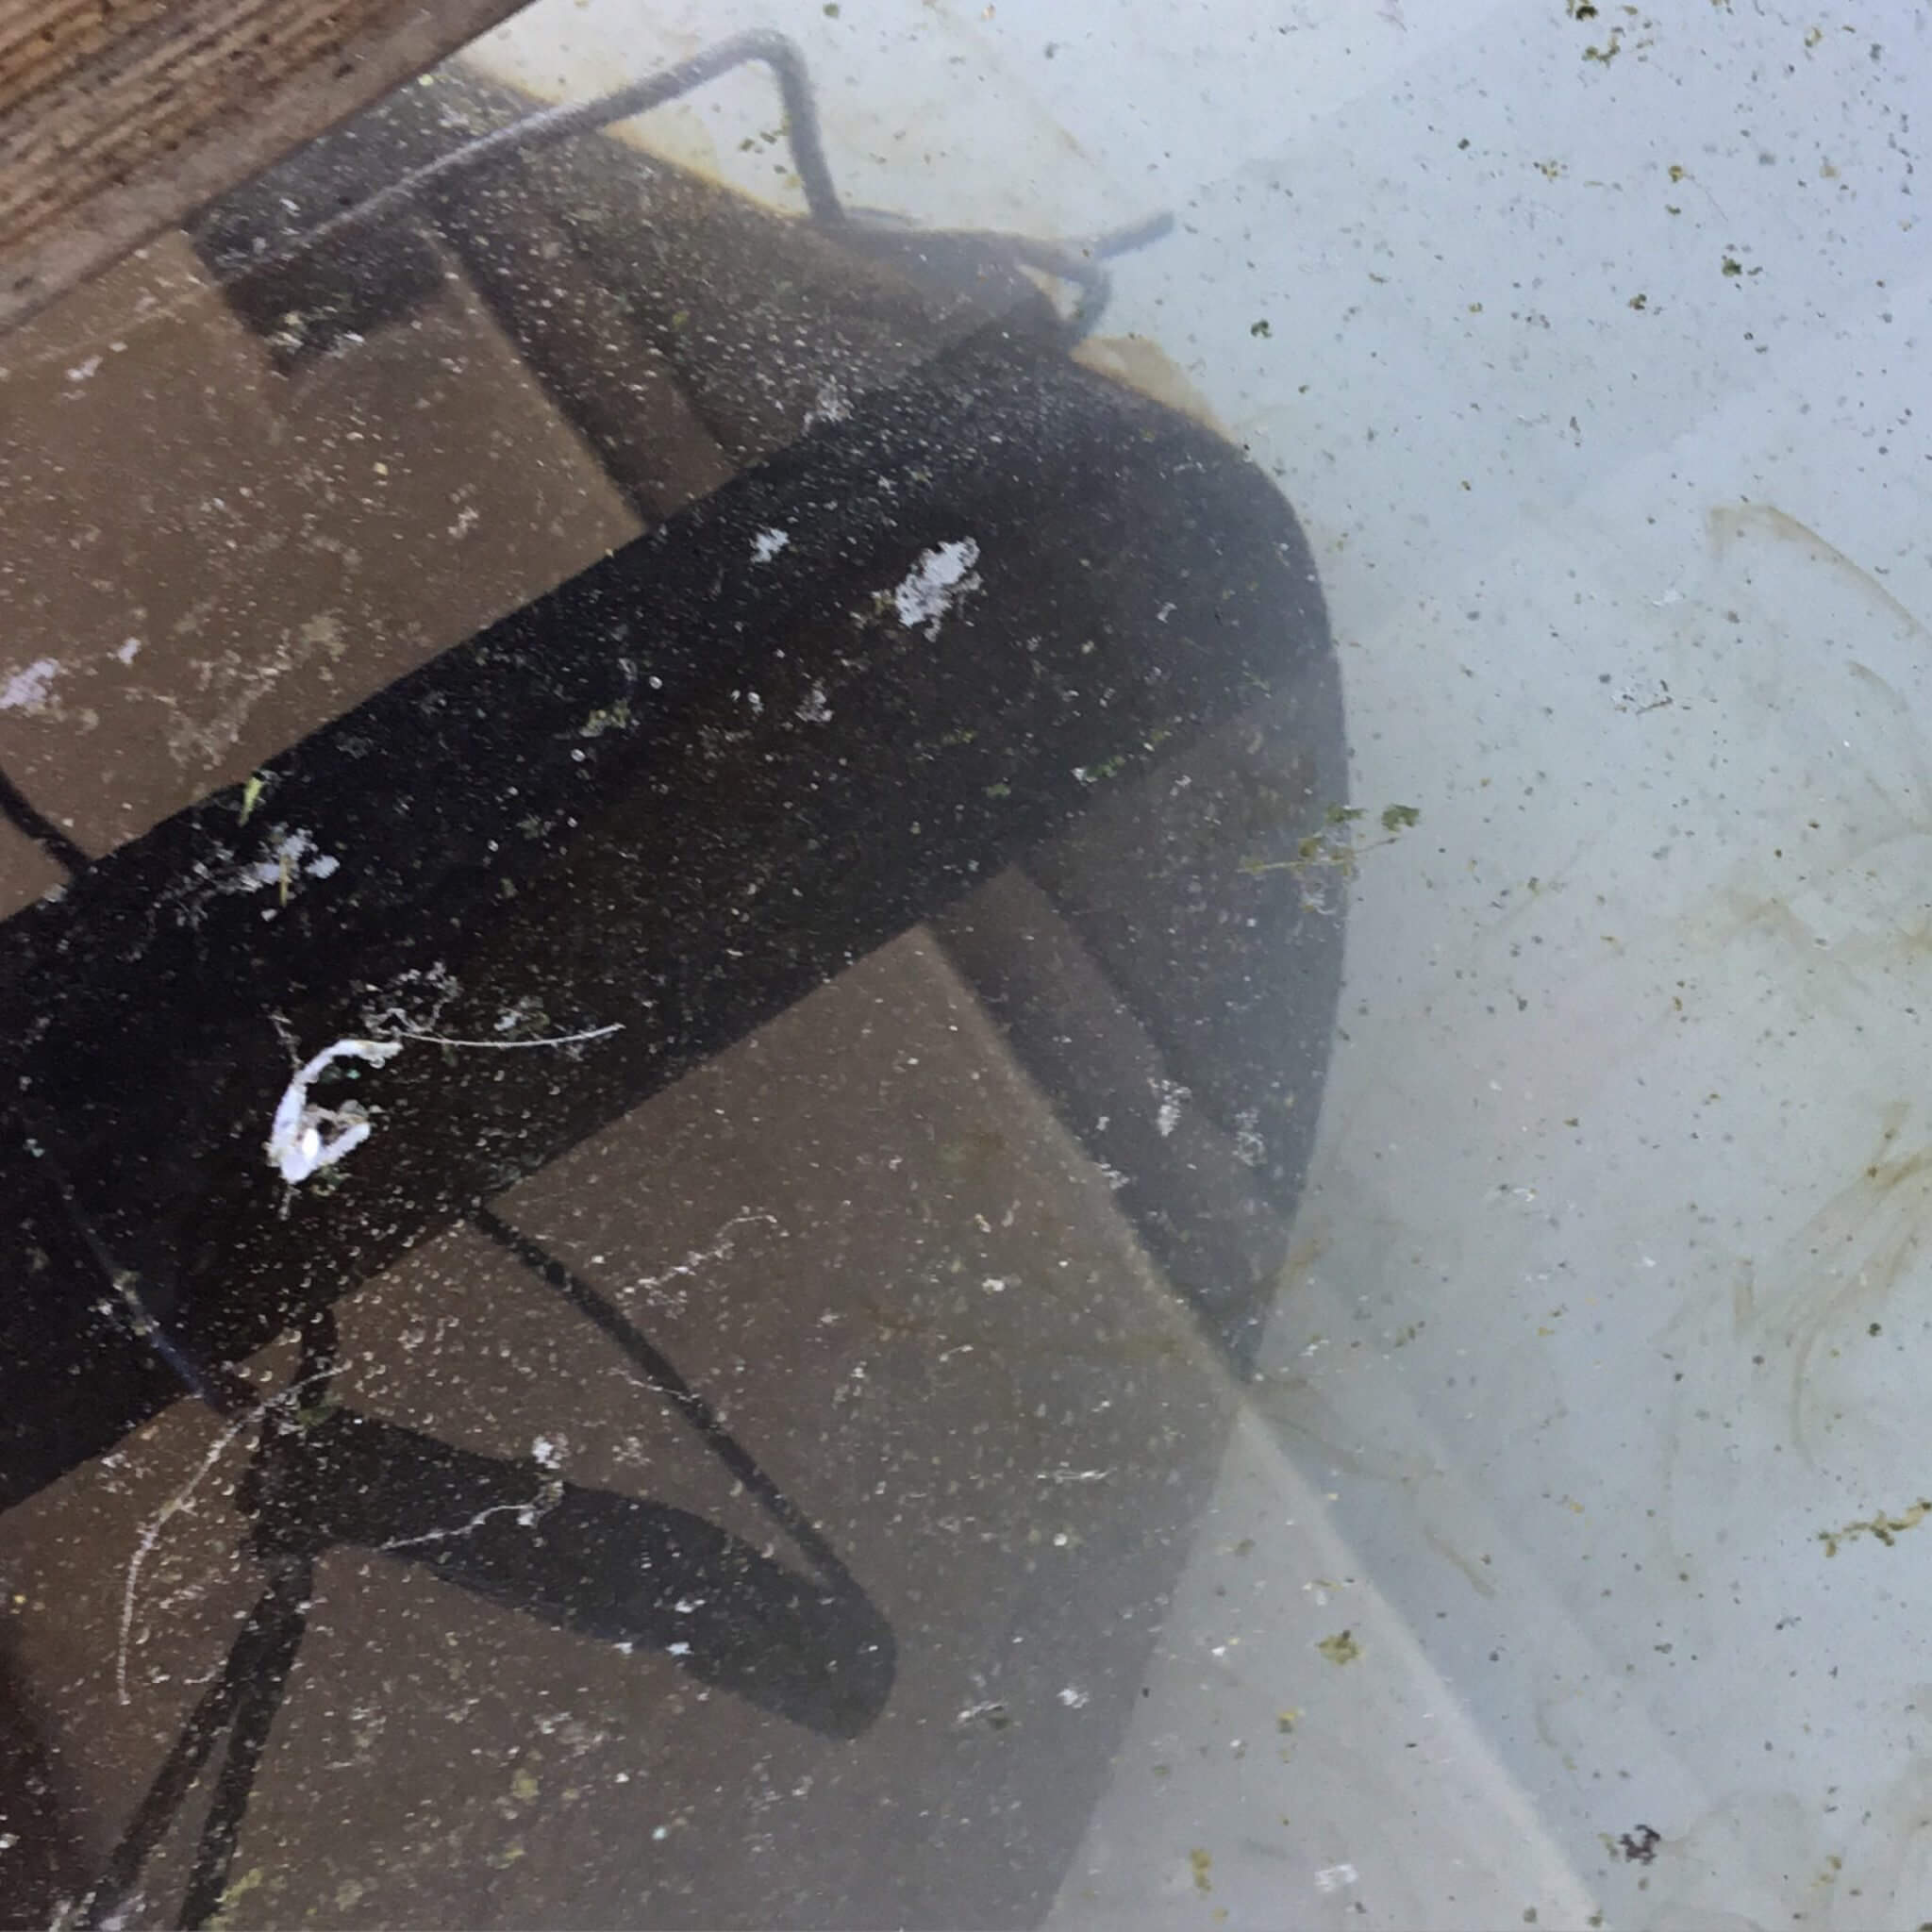
How much better does it look, it will have a black sludge all over it, to remove this you need to scrub it with a scourer under a tap. Once clean I let it dry in the sun for a bit.
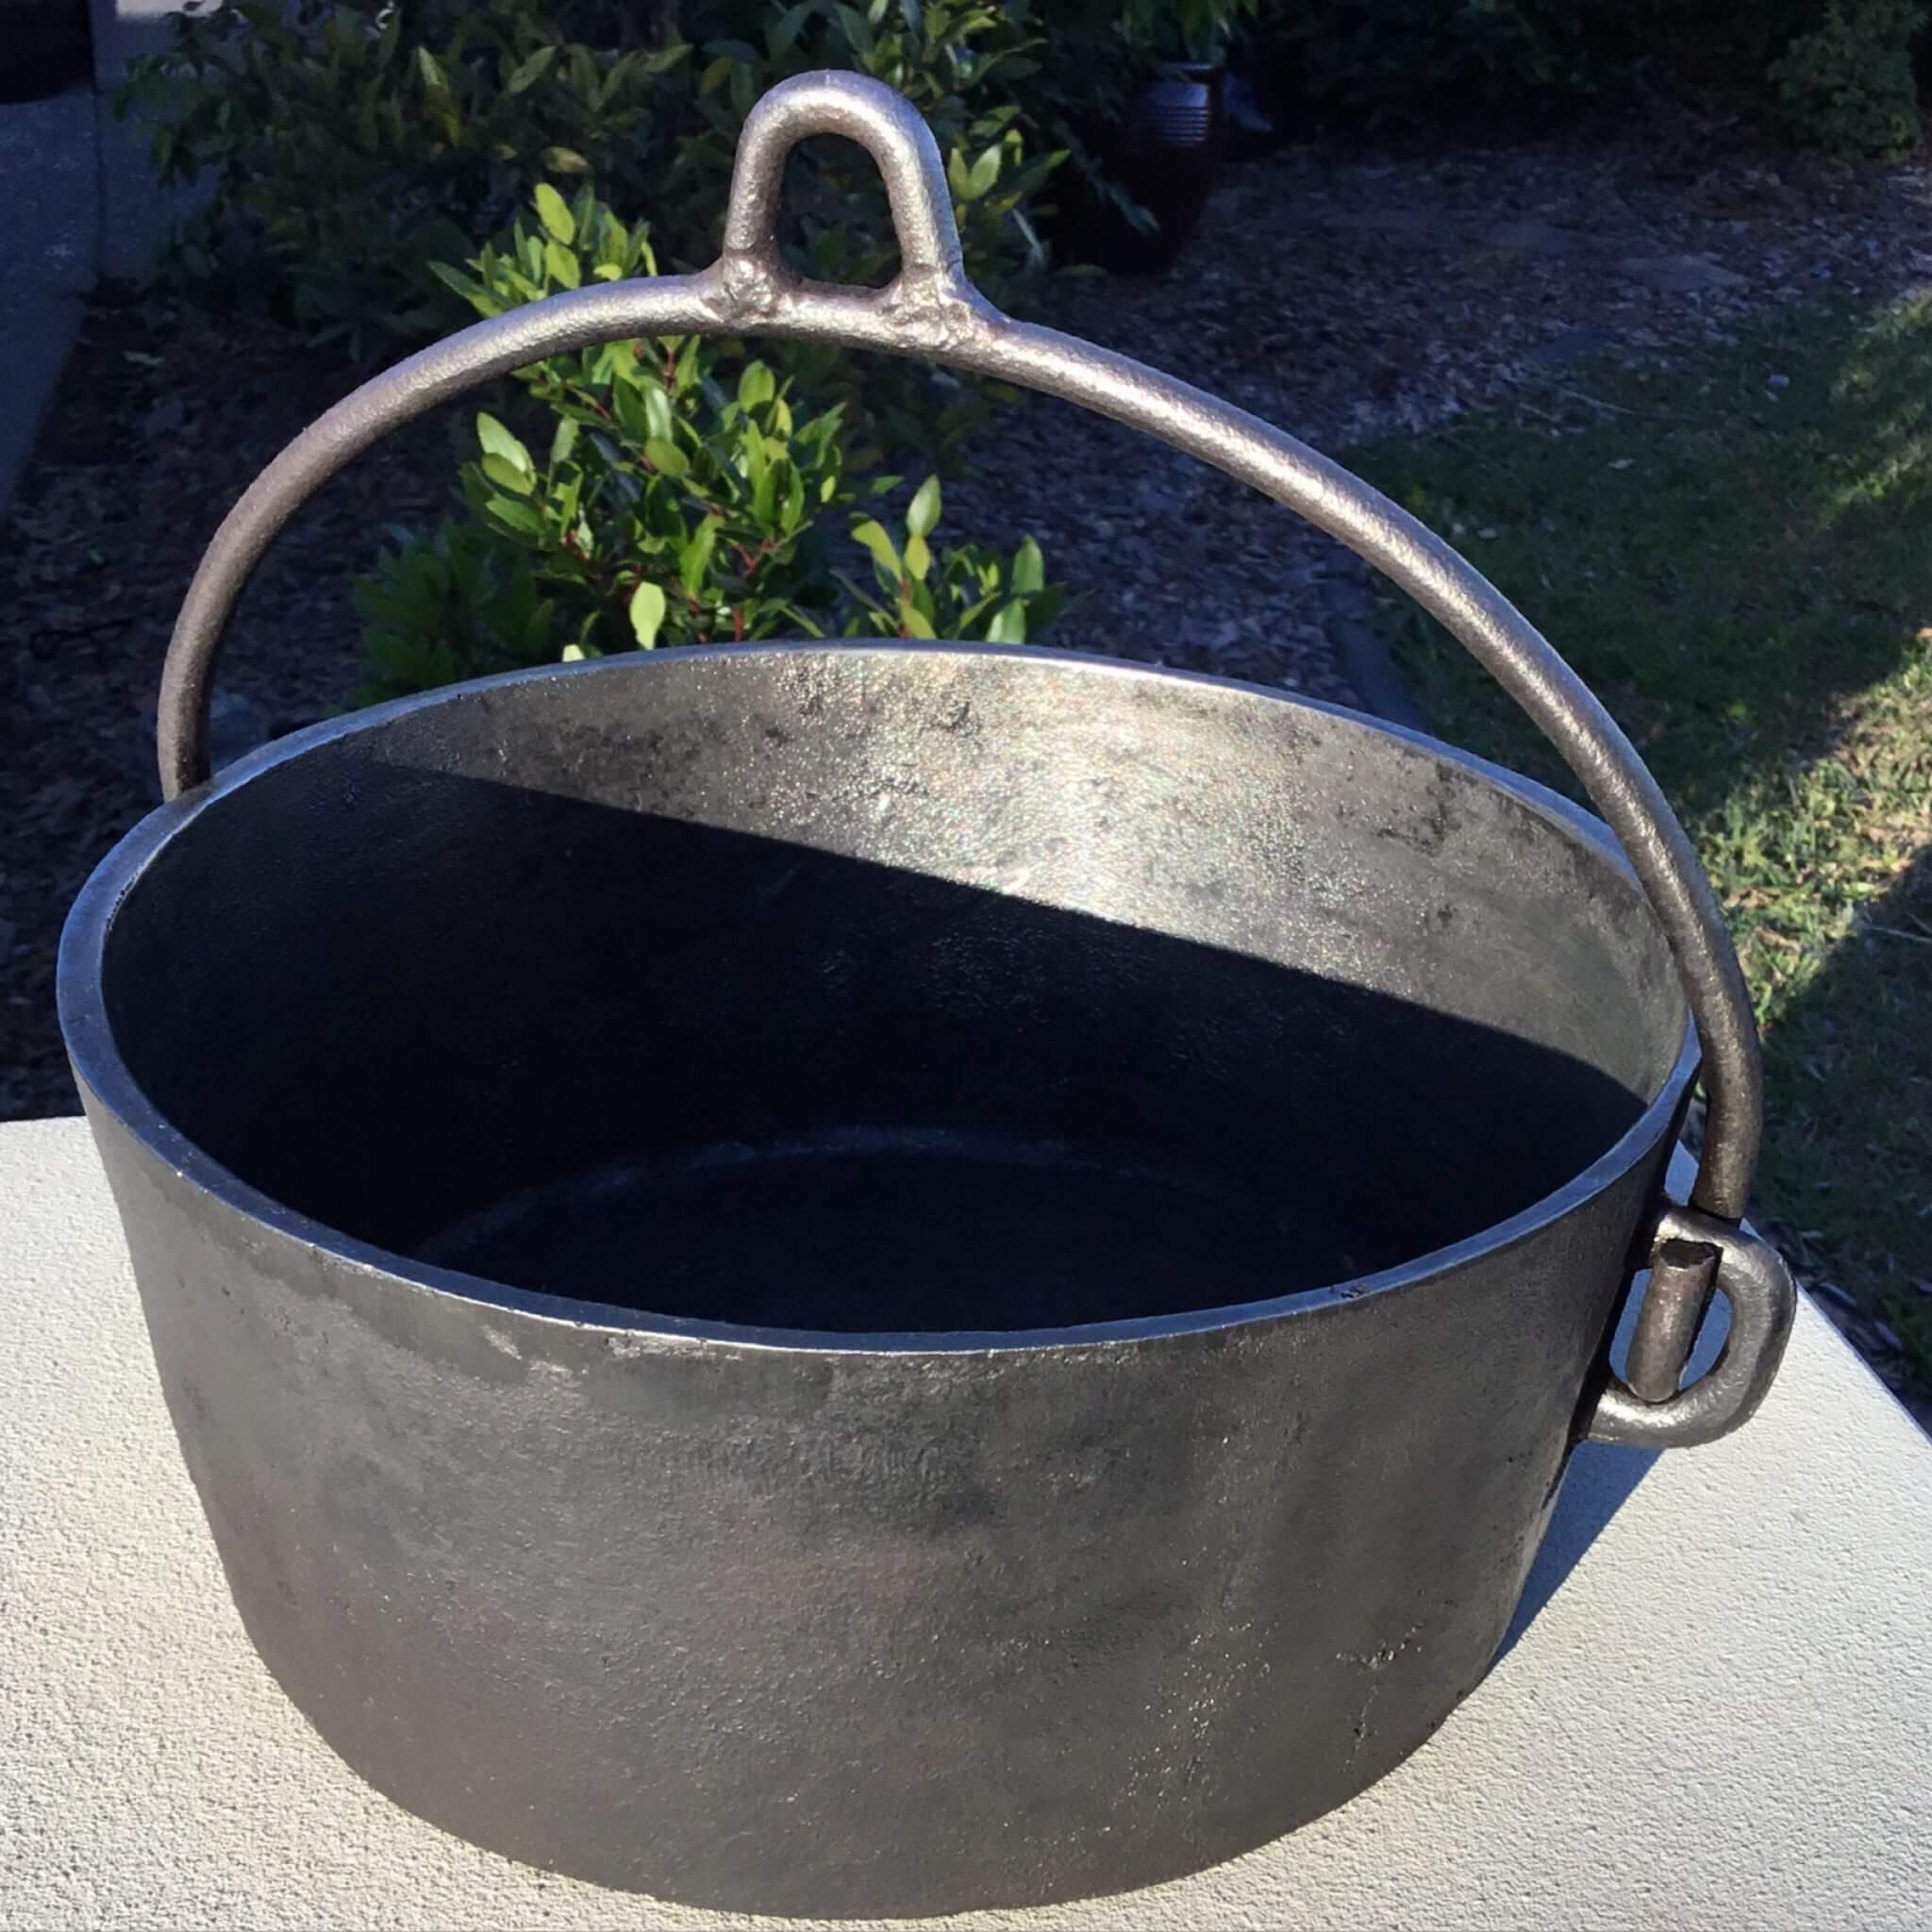
Step Seven.
It’s all clean and ready to be re-seasoned, how good does it look? To learn more about seasoning click here
Final Thoughts on the Cleaning Rusty Camp Ovens with Electrolysis Method
I used to like using the molasses method as its gentle on old camp ovens. However, the electrolysis method is less messy and does not smell the place out like the molasses did and is quite easy to set up too. For more detailed information on this process Click Here
Things to Remember:
- You need to do this in a well-ventilated area as this process creates hydrogen gas which can potentially be flammable.
- Don’t use stainless steel for the anode as it creates a hazardous byproduct called hexavalent chromium.
- Even know it only 12 volts makes sure you keep children away from your Electrolysis setup.
- Thoroughly wash the restored piece before reseasoning.
- You can use the mixture a few times until it stops working and you need to replace the liquid mixture.